You need to bring your Shopify product list into warehouse software, another business system, or a new selling platform as part of an ecommerce data migration. The information is already in Shopify admin, but copying it product by product soon becomes impractical. The Shopify API gives software a way to request that data directly from your store.
The first connection often comes down to a few small details. Is the app installed on the right store? Are you sending the right token? Does the app have permission to read products? Understanding how these pieces fit together makes it much easier to find the cause when a request does not return what you expect.
In this guide, you will connect an app to Shopify and retrieve product data in Postman. The two practical steps will show you how to send a request, read the important fields in the response, and compare them with your store. You do not need to build a complete application to get started. Each explanation sits alongside the action it supports, so you can understand what you are doing as you go.
We will start with a small request and a product you can recognize. Once you can read and verify that product’s data, you have a clear starting point for expanding the integration.
Which Shopify API Should You Use to Access Product Data?
Before creating an app, decide what the other system needs to know. For this first request, we will retrieve basic product information: its name, ID, status, and vendor. Keeping the scope small gives you a manageable way to check the connection before building a larger integration.
An API lets software send a structured request to Shopify and receive a response. Instead of opening each product page, you describe the information you want the software to read. If you are preparing for a Shopify store migration, understanding how to access product data through the Admin API is an important first step.
For product data managed in Shopify admin, we will use the GraphQL Admin API. GraphQL lets you choose the fields returned by a query, such as a product’s name and ID. Fewer fields make the response easier to inspect while you are checking the connection.
You may also come across the Storefront API and Customer Account API. The table below compares their roles. This guide focuses on administrative product data, so the steps use the GraphQL Admin API.
| API | Core purpose | Use cases |
|---|---|---|
| GraphQL Admin API | Read and manage administrative store data. | Catalog extraction, warehouse integrations, product management, and migration preparation. |
| Storefront API | Provide product browsing, carts, and checkout for customer shopping experiences. | Headless storefronts, mobile shopping apps, and custom buying interfaces. |
| Customer Account API | Access a signed-in customer’s own account data. | Customer profiles, addresses, and order history in customer account experiences. |
Start with a query you can check
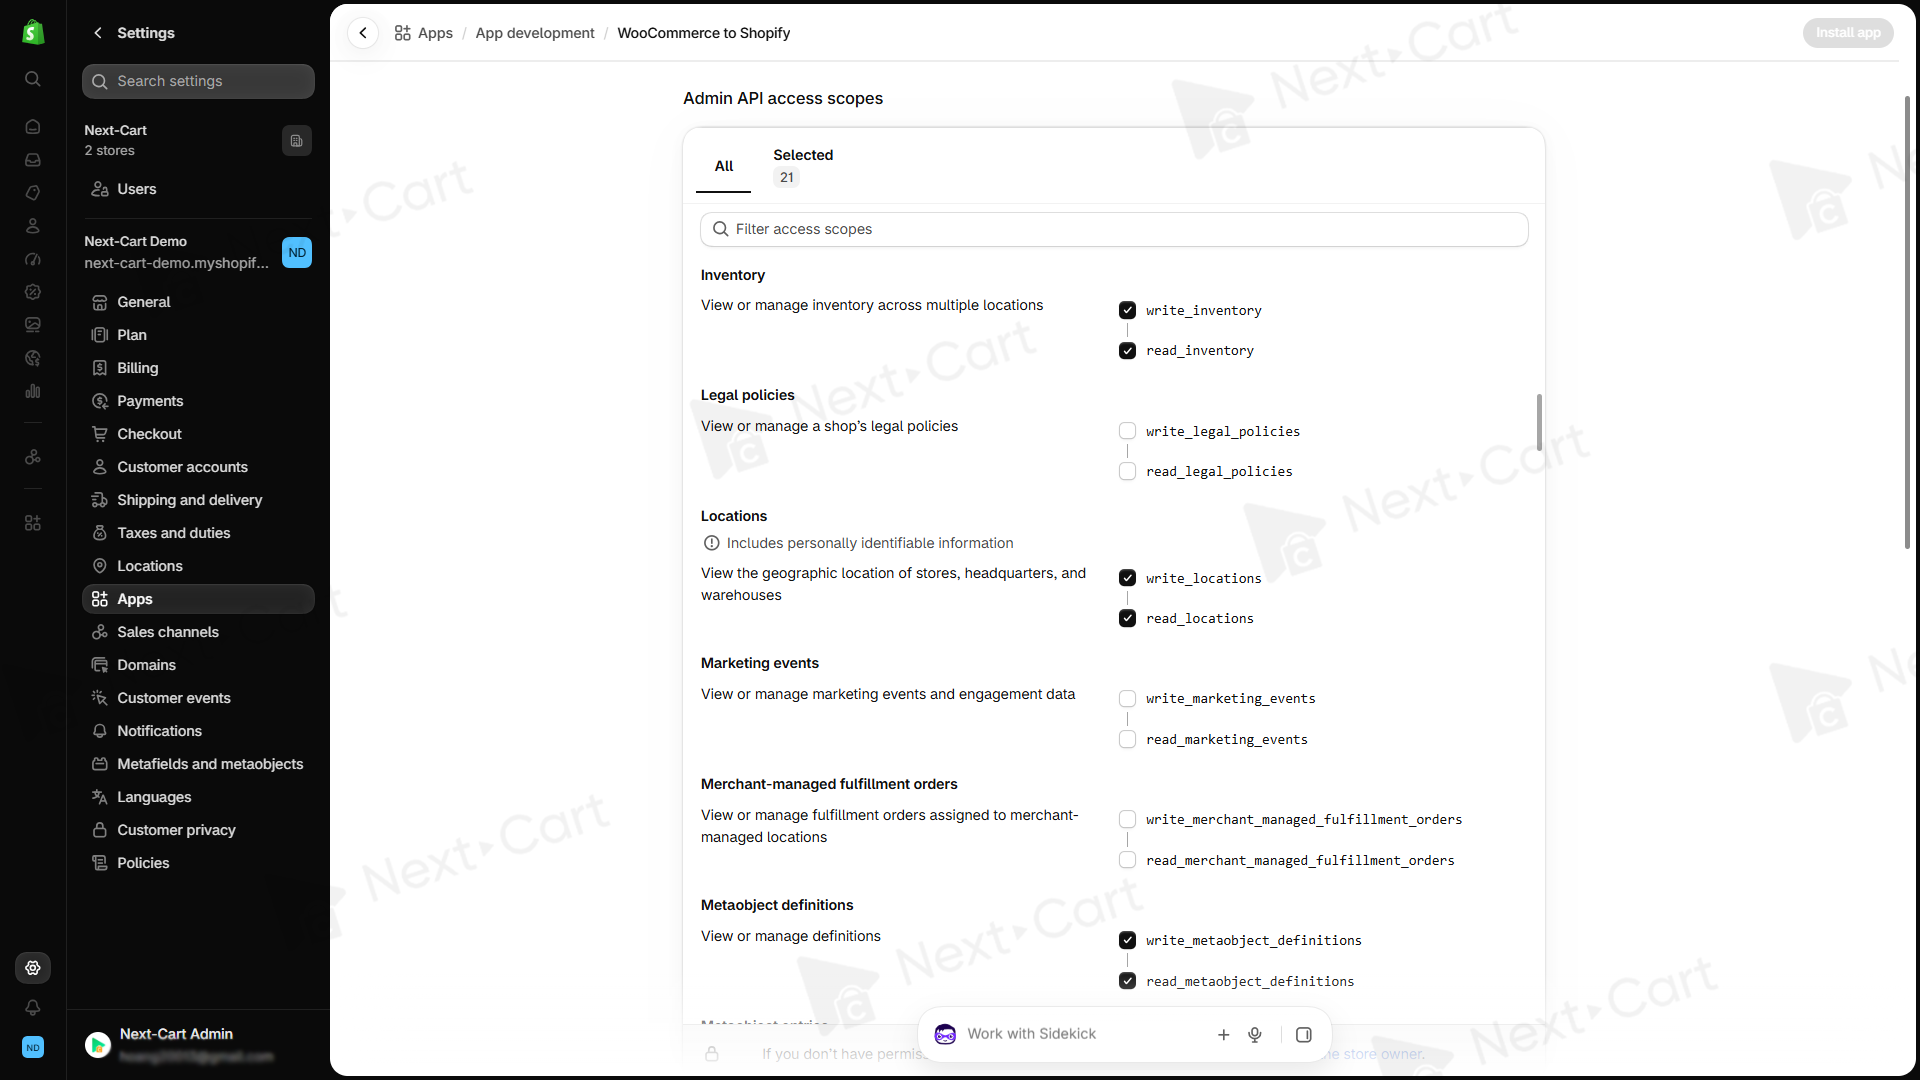
We will use “The Complete Snowboard” as our reference product. Rather than requesting the whole catalog immediately, we will retrieve up to 10 products and inspect the result. The query describes that request; it does not filter by product name. On your own store, choose a product that appears in the returned list to compare with Shopify admin.
When the response arrives, compare it with what you requested. Look for a recognizable product and the expected values, and check for errors. This habit matters even when the request appears to have worked.
Each item of information is a field. This query requests id, title, handle, status, vendor, productType, and createdAt. The same field names appear in the response, making it easier to connect what you asked for with what Shopify returned.
What You Need Before Connecting to the Shopify API
Before software can read your store’s data, Shopify needs to know which app is requesting access and what it is allowed to do. The app provides that access configuration. It can support an internal integration without providing a shopping interface for customers.
Use a test store and a product with easy-to-recognize information. Have the following ready before you begin:
- A store to practice on and an account with permission to create, manage, and install the app.
- A product with a recognizable name, status, and vendor.
- Postman to send requests. Keep credentials private and out of shared screenshots or files.
- The product details you will compare with the API response.
Choose permissions based on what you need to read
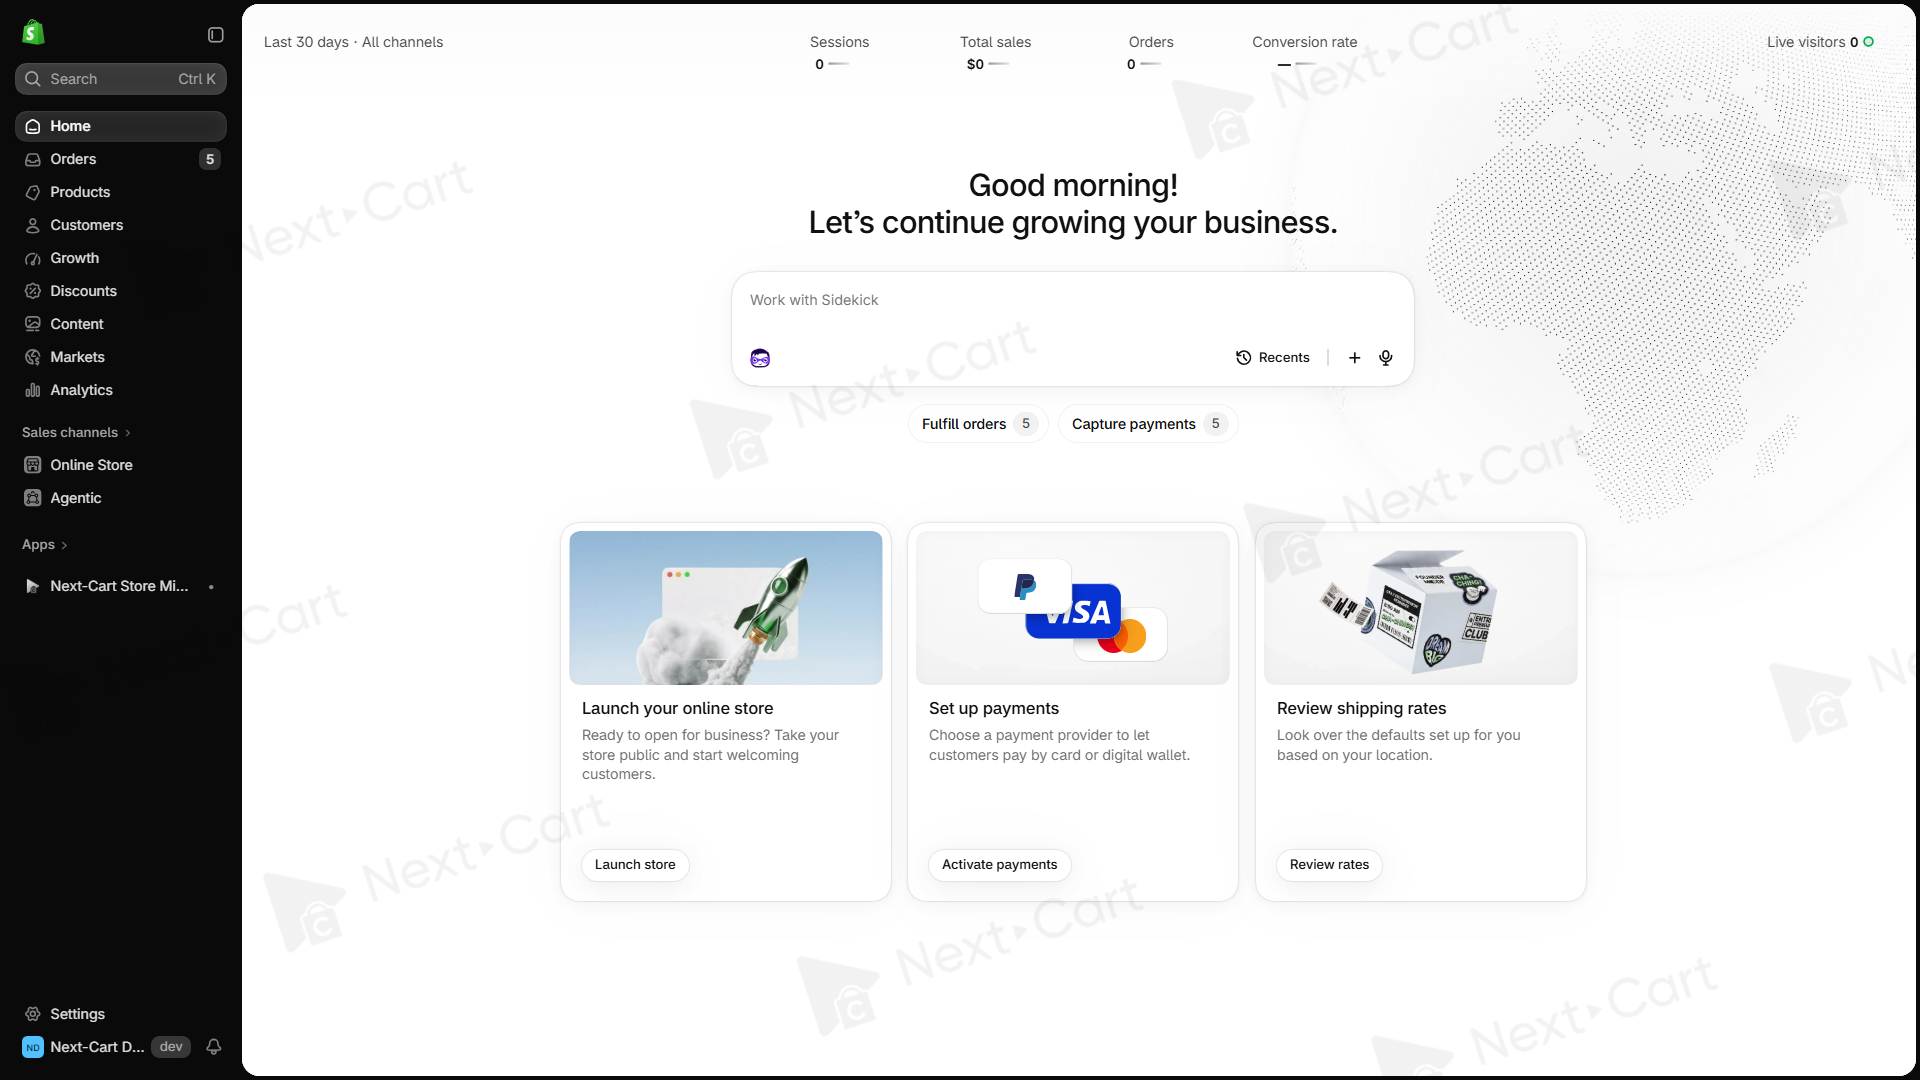
The access scope list can look overwhelming, but you do not need to work through every option. Come back to the task: reading product information. An access scope gives an app permission to access a particular group of data, so start with the permission your query needs.
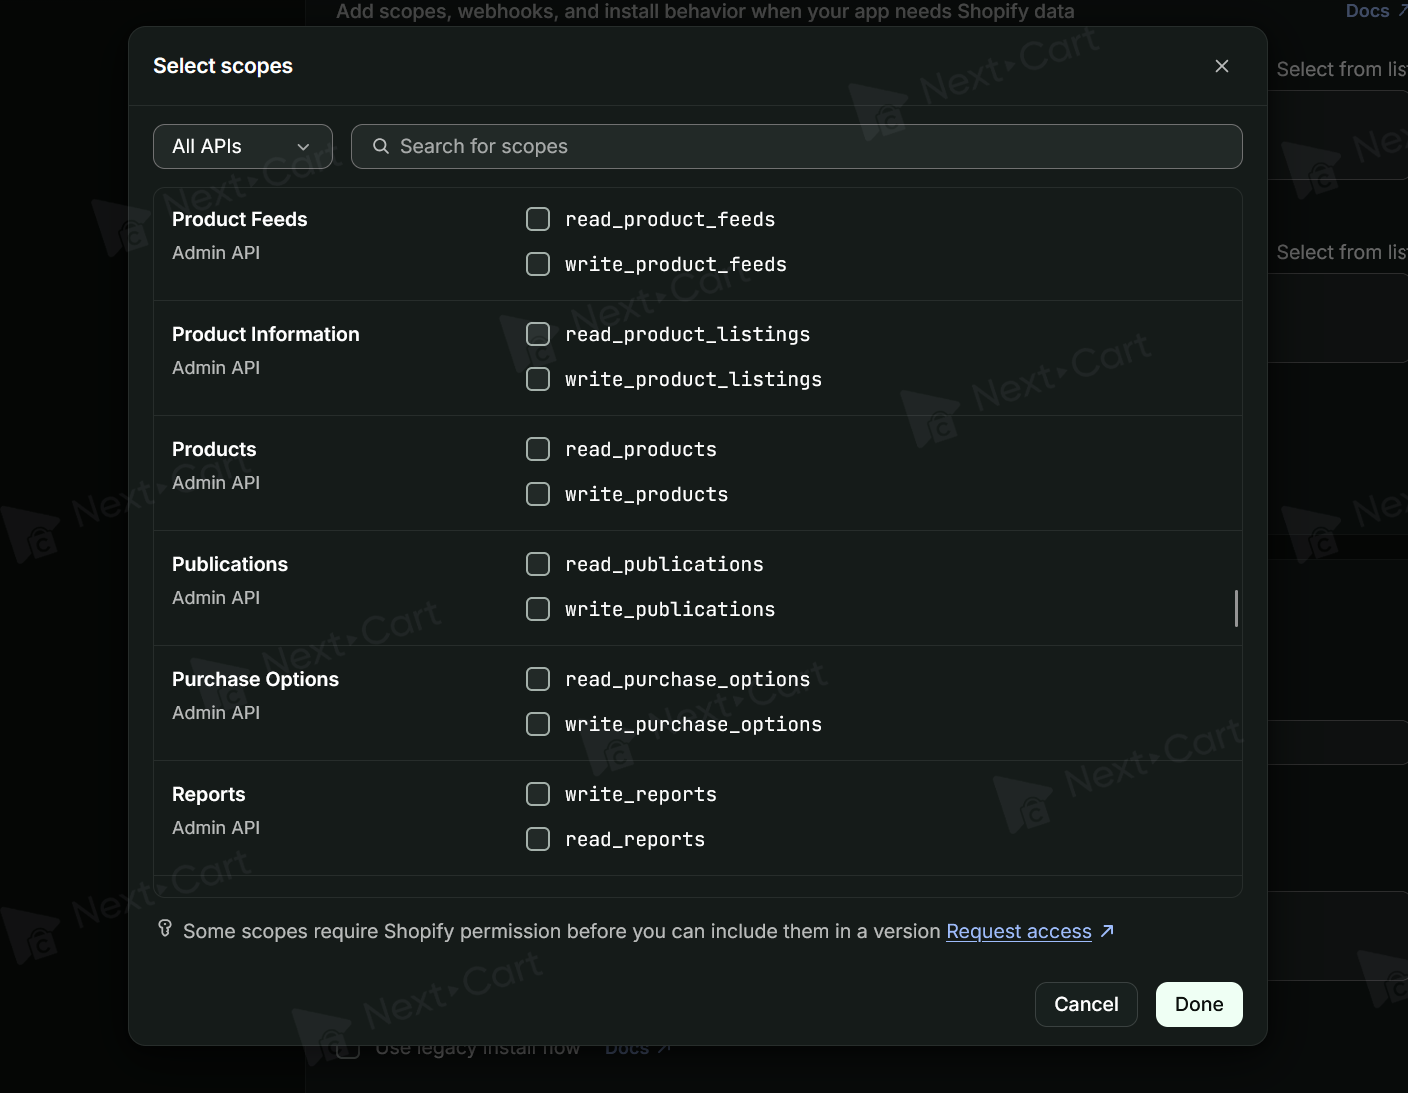
read_products is the scope associated with reading products. The permissions must cover the fields in your query. Adding unrelated permissions will not fix a request with an incorrect structure.
It also helps to separate installation from permission. An app may already be installed on a store without having access to the data your query requests.
Understand the credentials
After creating an app, you will work with its credentials. An access token accompanies requests to the Admin API to authenticate access. It is not the store manager’s Shopify login password.
Three values are easy to confuse here: client ID, client secret, and access token. The client ID identifies the app. In the client credentials grant flow, the app uses its client ID and confidential client secret to request an access token.
That token is what you send with the product API request. Keep the client ID and client secret out of the header reserved for the access token.
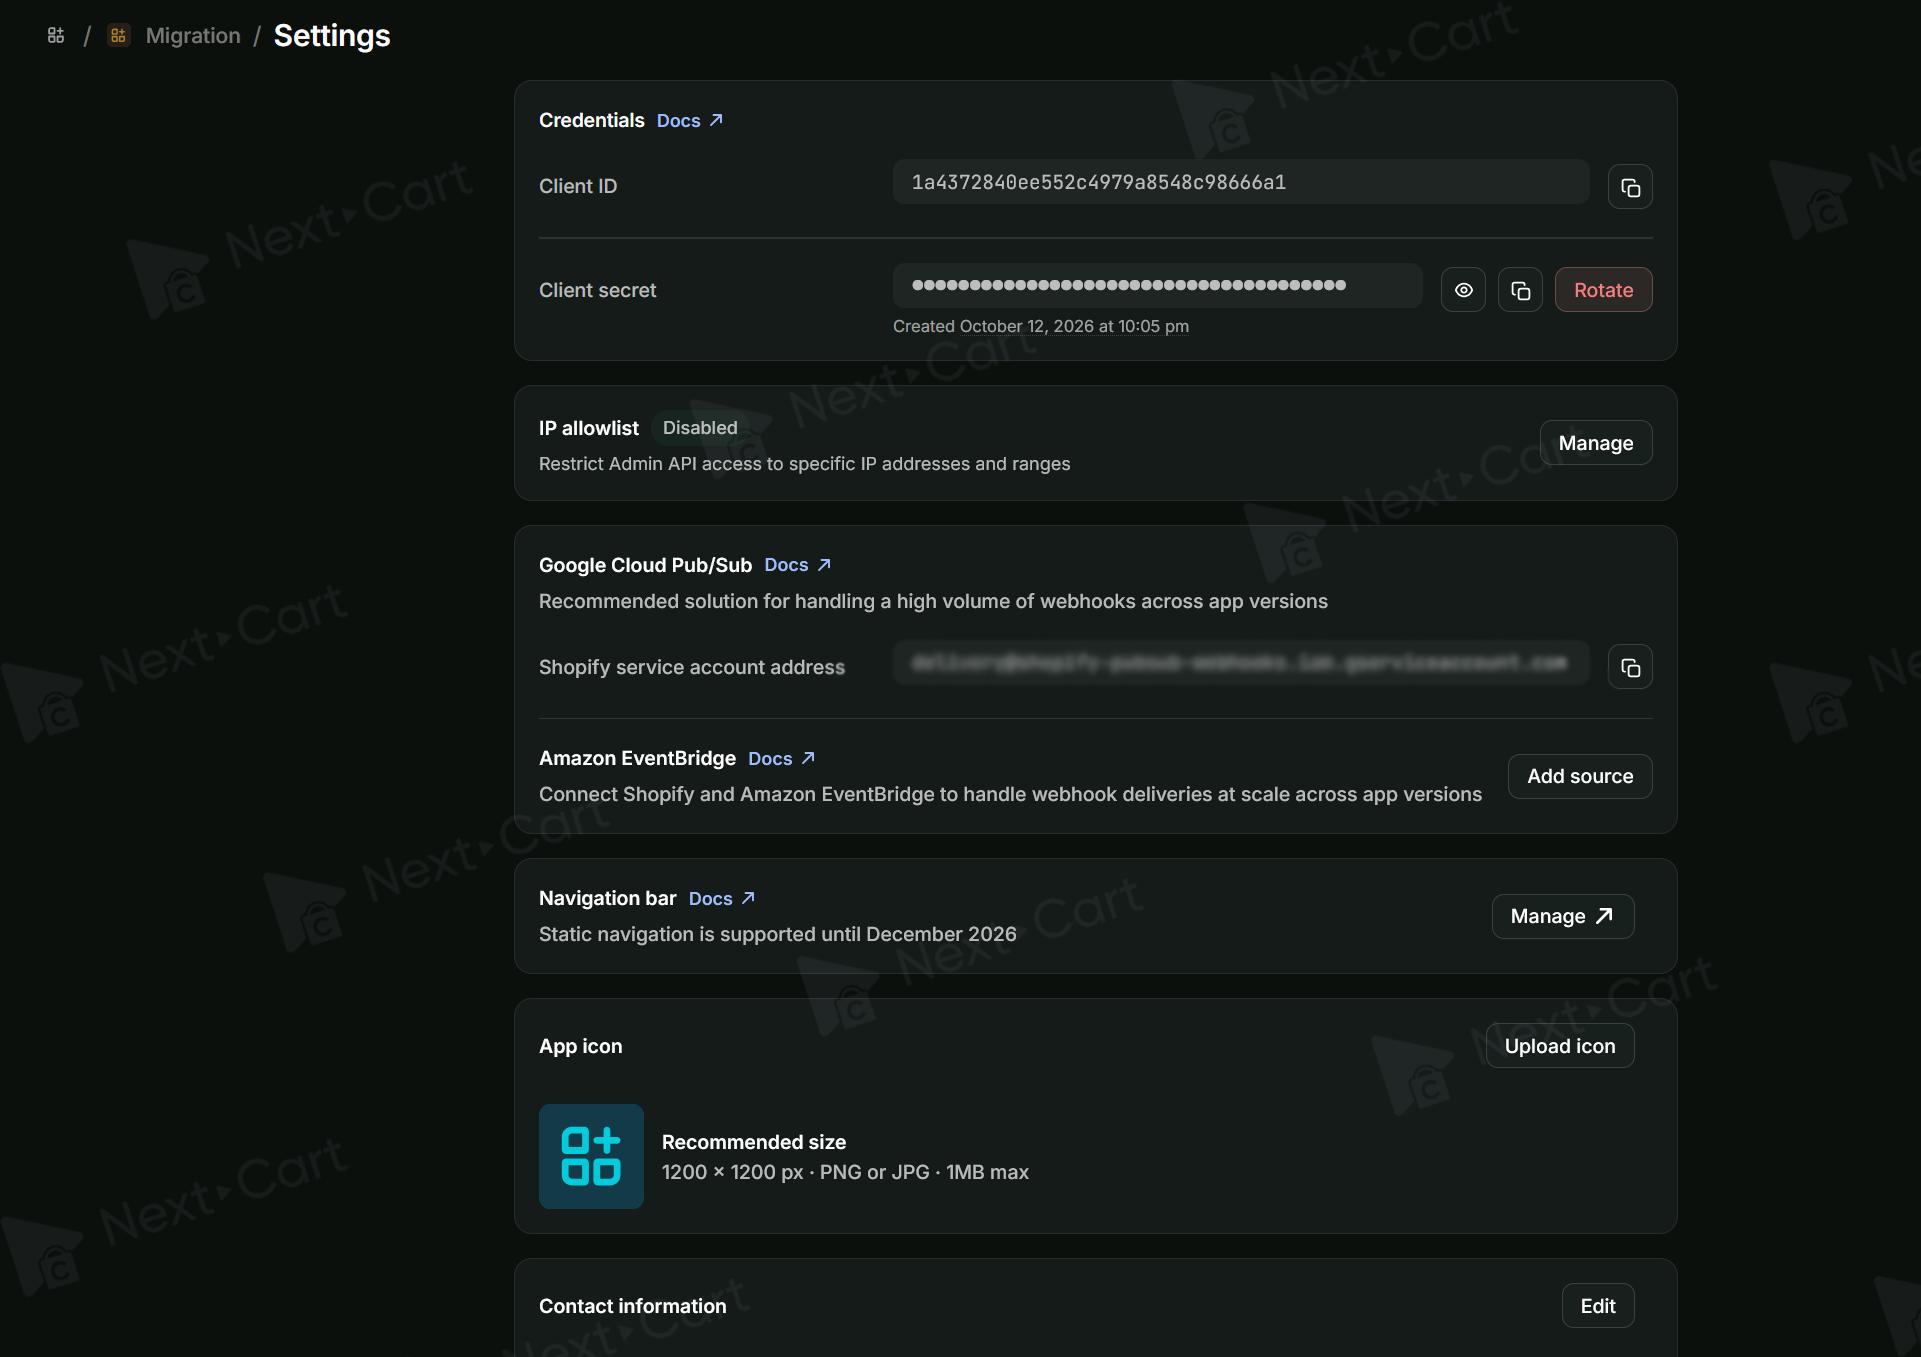
The client credentials grant applies when the app and store belong to the same Shopify organization. Tokens issued through this flow expire after 24 hours. If you are working on a client’s store, check this requirement first: having access to the store does not necessarily mean that the app and store belong to the same organization.
Check your account access before you begin
The example uses a store on the Basic plan. To create the app through this setup, use the store owner account or an account with App developer permissions, and make sure it can install the app on the selected store. Checking access now avoids an interruption when you reach the installation screen.
Choose a product to compare
Before sending the request, note a few details that will help you recognize the product. For “The Complete Snowboard,” we will compare:
| Field | Value |
|---|---|
handle |
the-complete-snowboard |
status |
ACTIVE |
vendor |
Snowboard Vendor |
productType |
snowboard |
Familiar values make the JSON much easier to interpret.
The demo query does not request variants or SKU data, so those fields are absent from the response. A missing SKU here does not indicate data loss: the API returns the fields requested by the query.
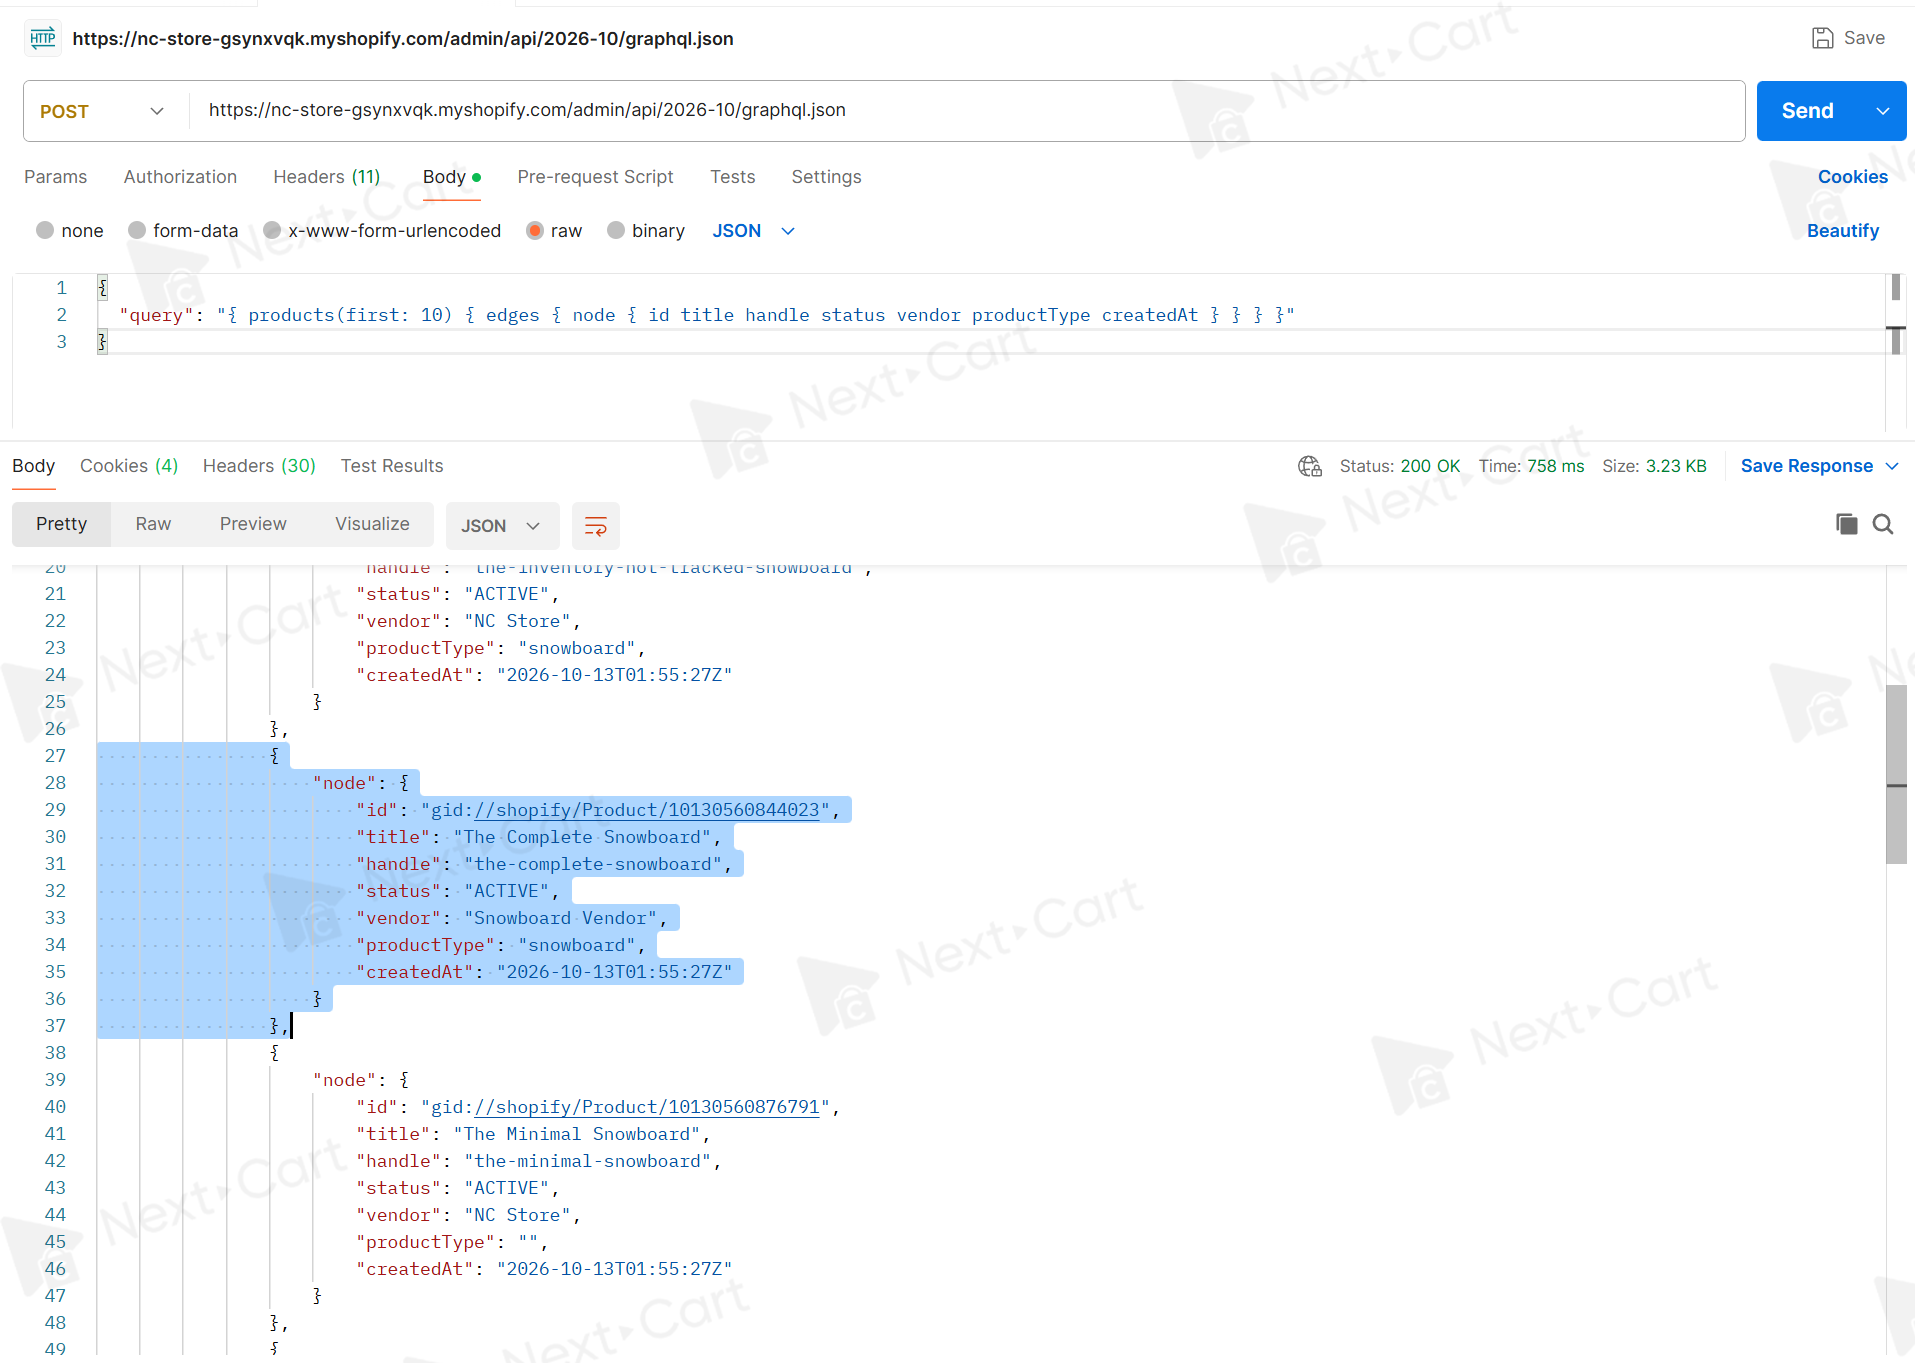
For your own store, choose a recognizable product and note its details before testing. Its name and ID will differ from the demo. You do not need to recreate the same product to check your connection.
Keep the API version consistent
This example uses API version 2026-10 and was tested on 13 October 2026. Keep the same version in your endpoint as you follow the query and results in this guide.
The API version determines which fields and operations a request can use. You will see it in the endpoint, the address receiving the request. A field added in a newer version may not exist in an older one, which can cause a query error. Check your query against the documentation for the version in your endpoint.
How to Connect Shopify API to Postman and Retrieve Products
Now let’s put the pieces together: create and install the app, obtain an access token, and use it to request product data. Completing access setup first gives you fewer things to check when you send the query.
Step 1. Create the app and set up access
First, give the app access to your test store. You will create the app, configure its permissions, install it on the store, and then obtain an access token through the applicable authentication flow.
Create and release the app
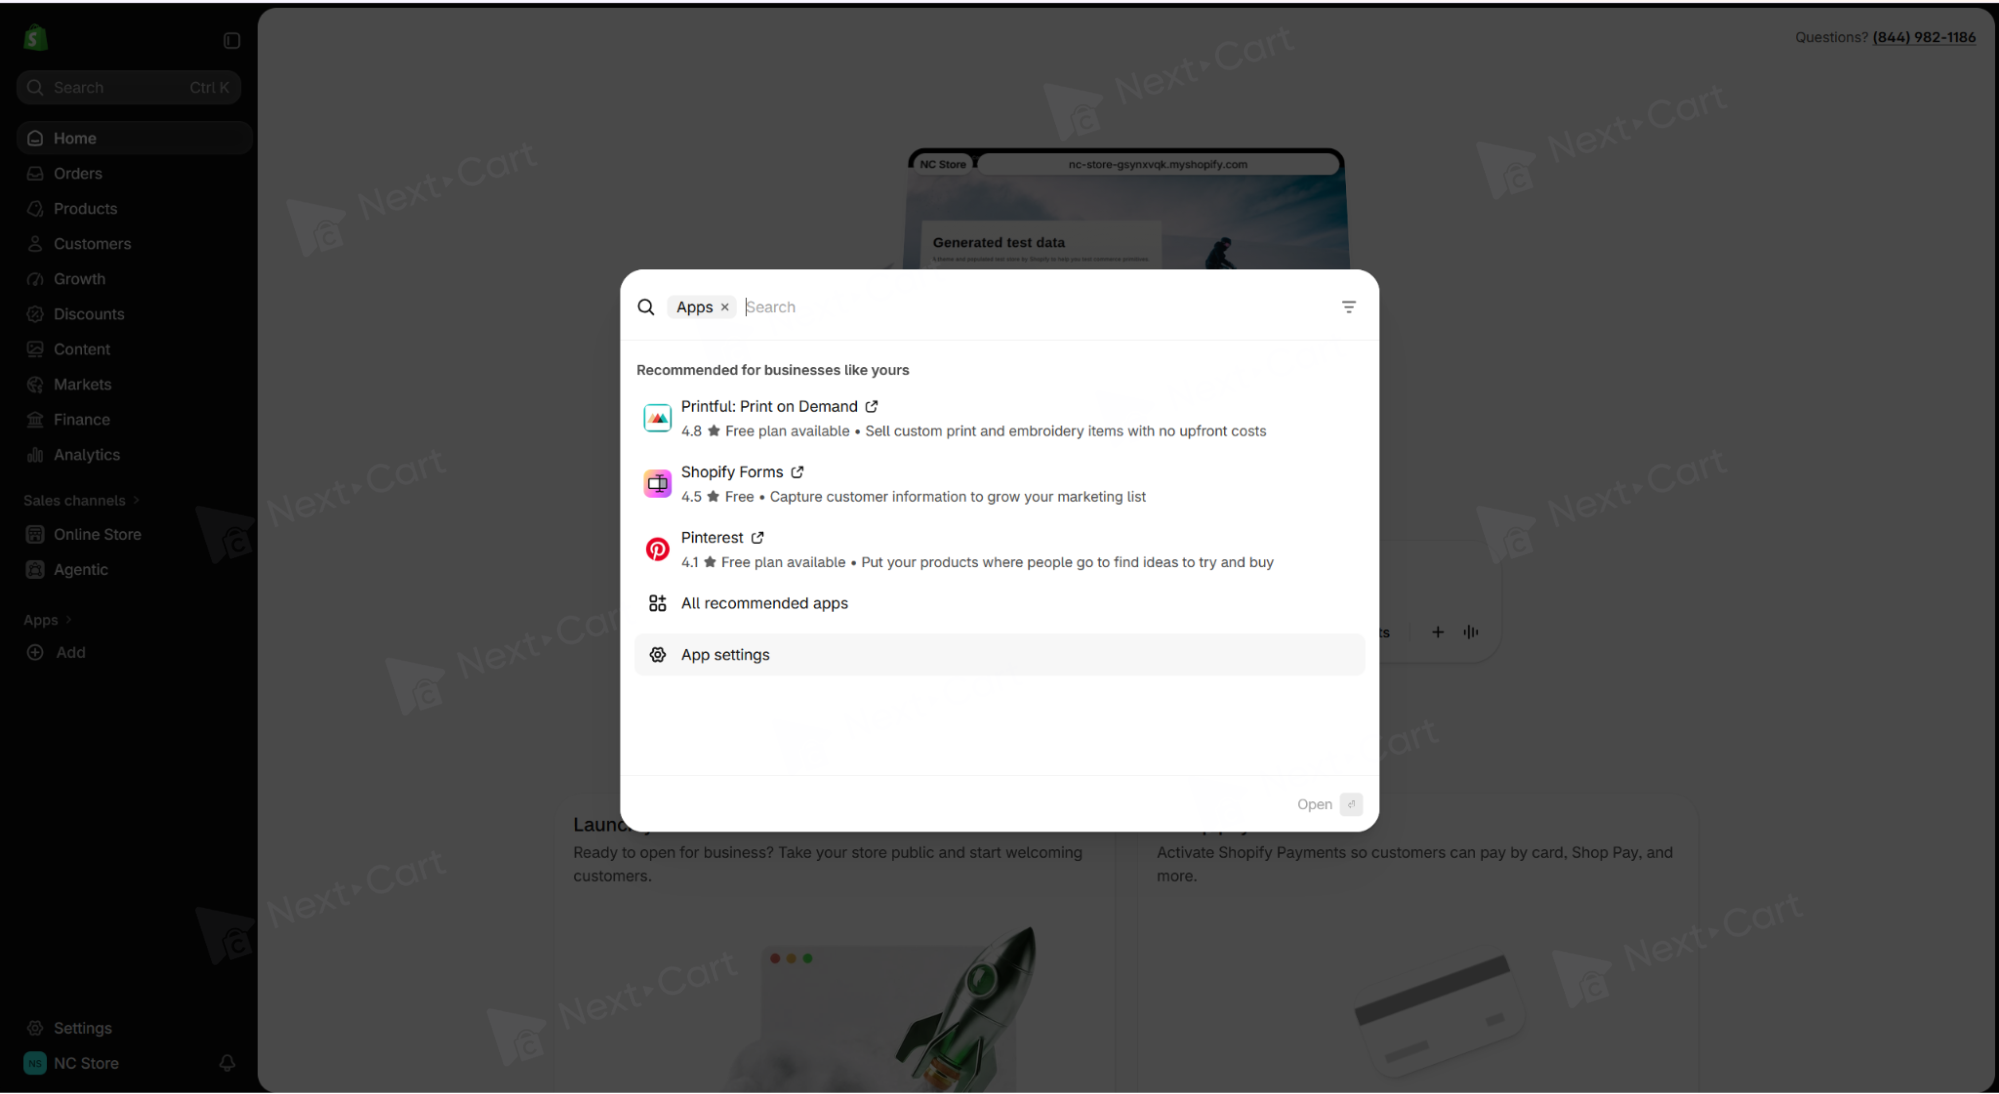
In Shopify admin, select Apps in the sidebar. This is the starting point for opening app management and moving into the Dev Dashboard.
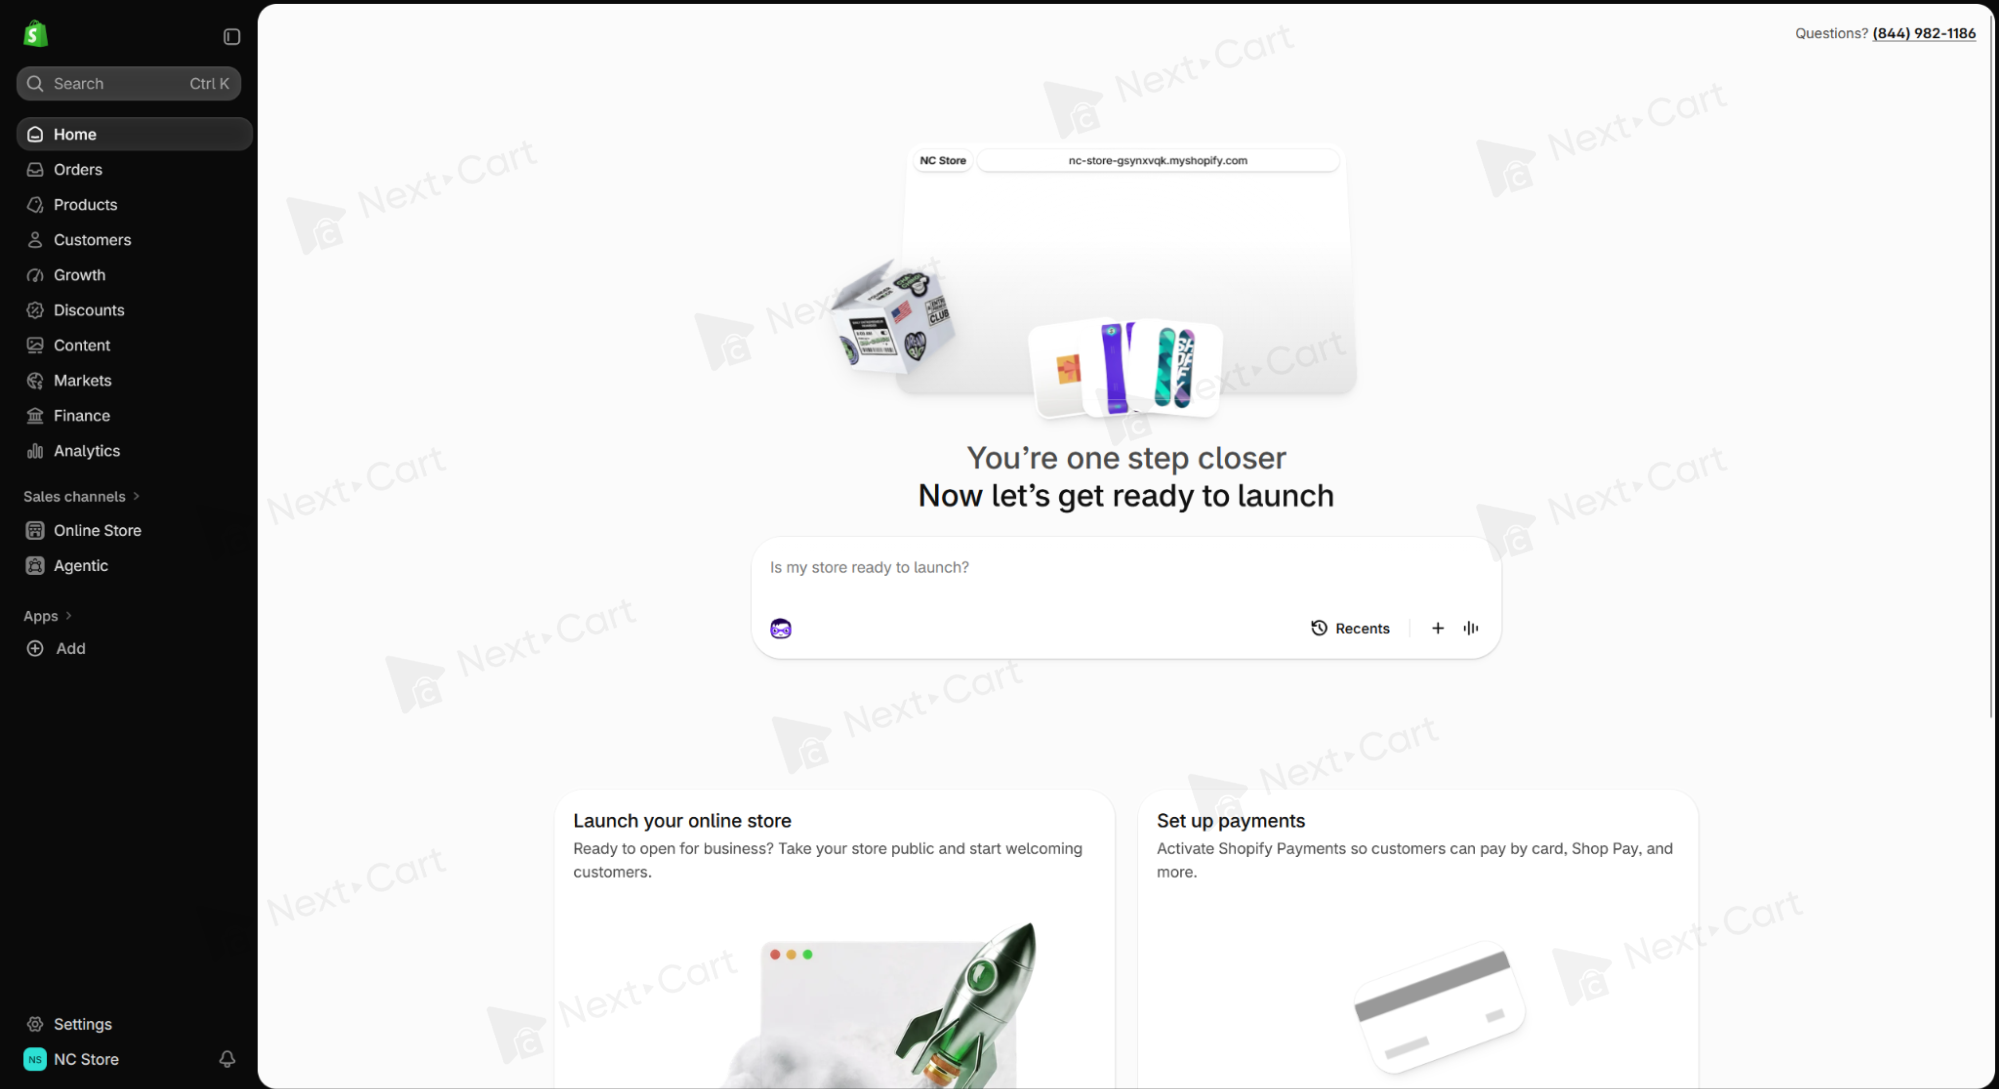
In the popup, select App settings to open the store’s app list.
If your account manages several stores, check the store name as you move between screens. It is a small check that helps you avoid connecting the app to the wrong store.
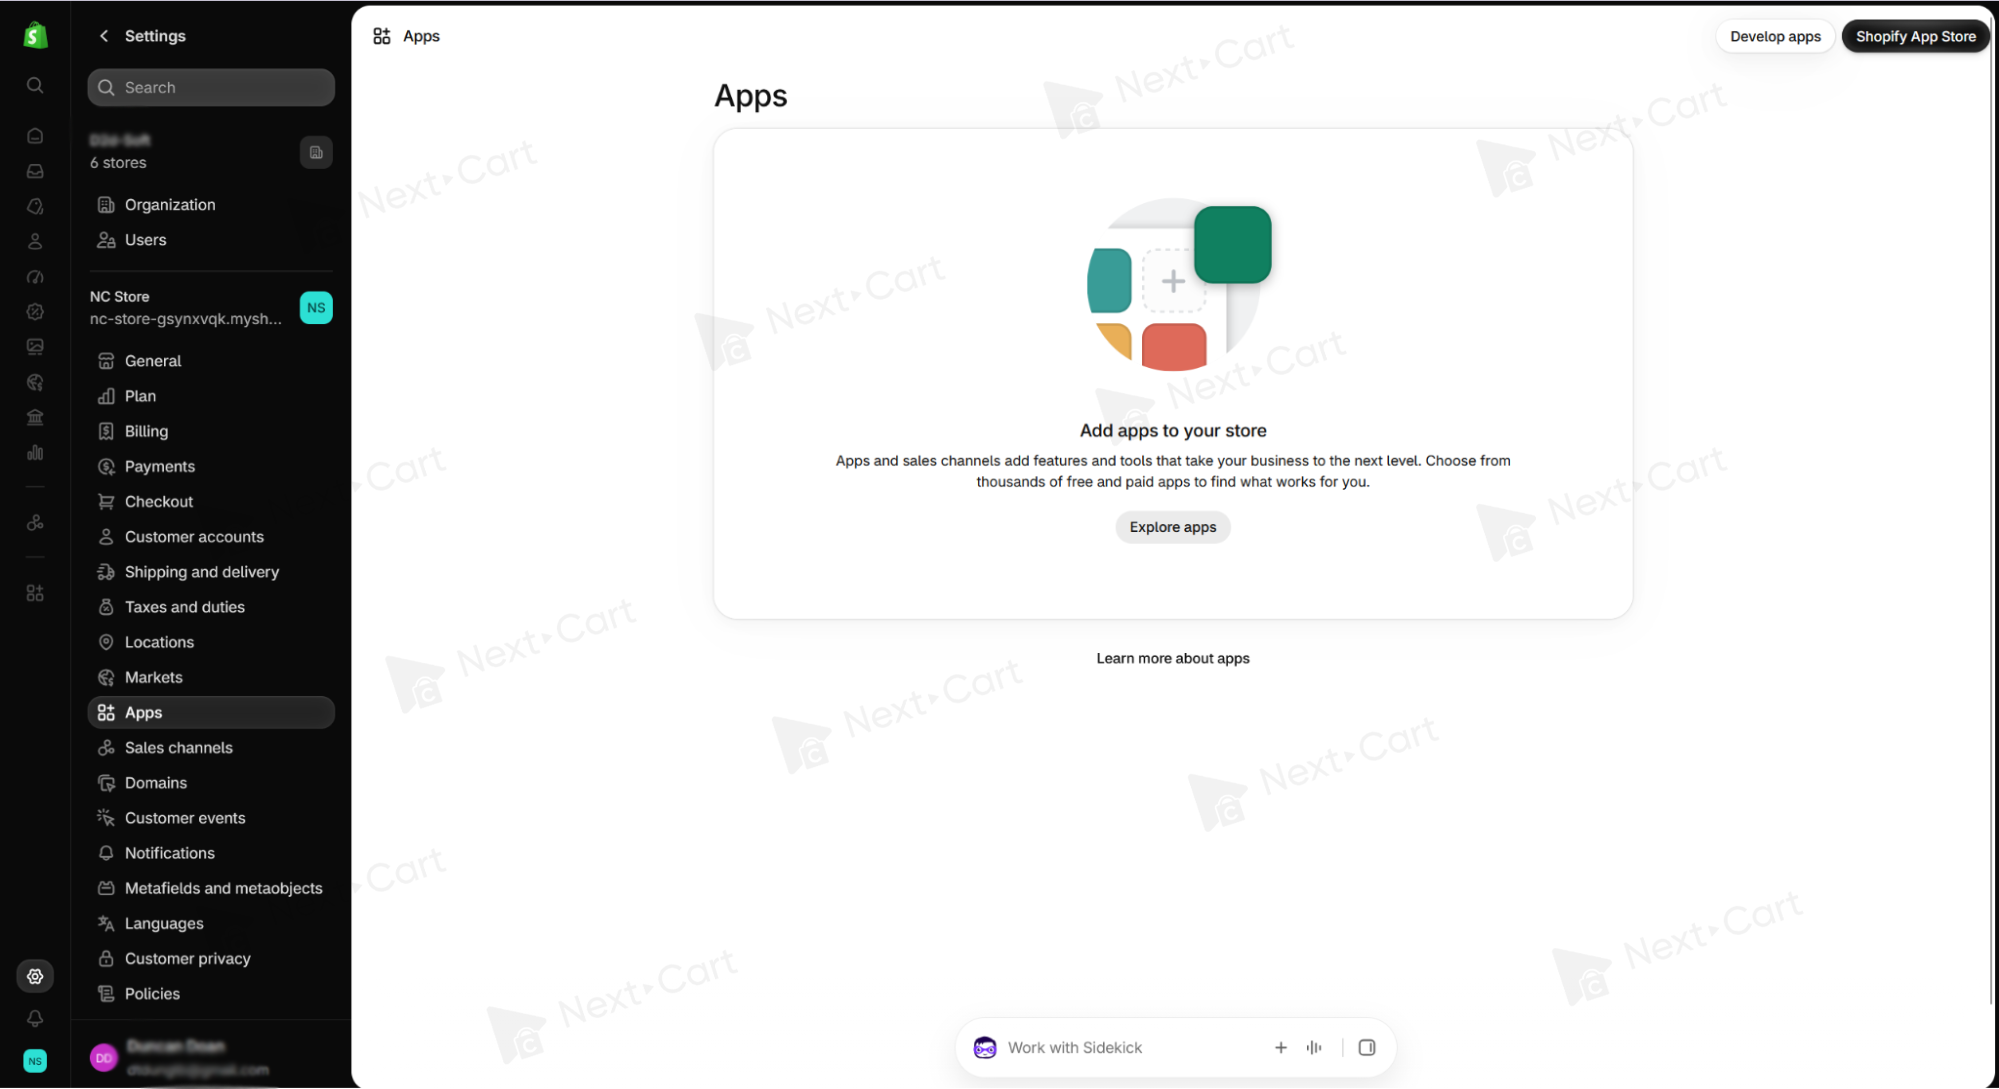
On the Apps screen, select Develop apps in the upper-right corner.
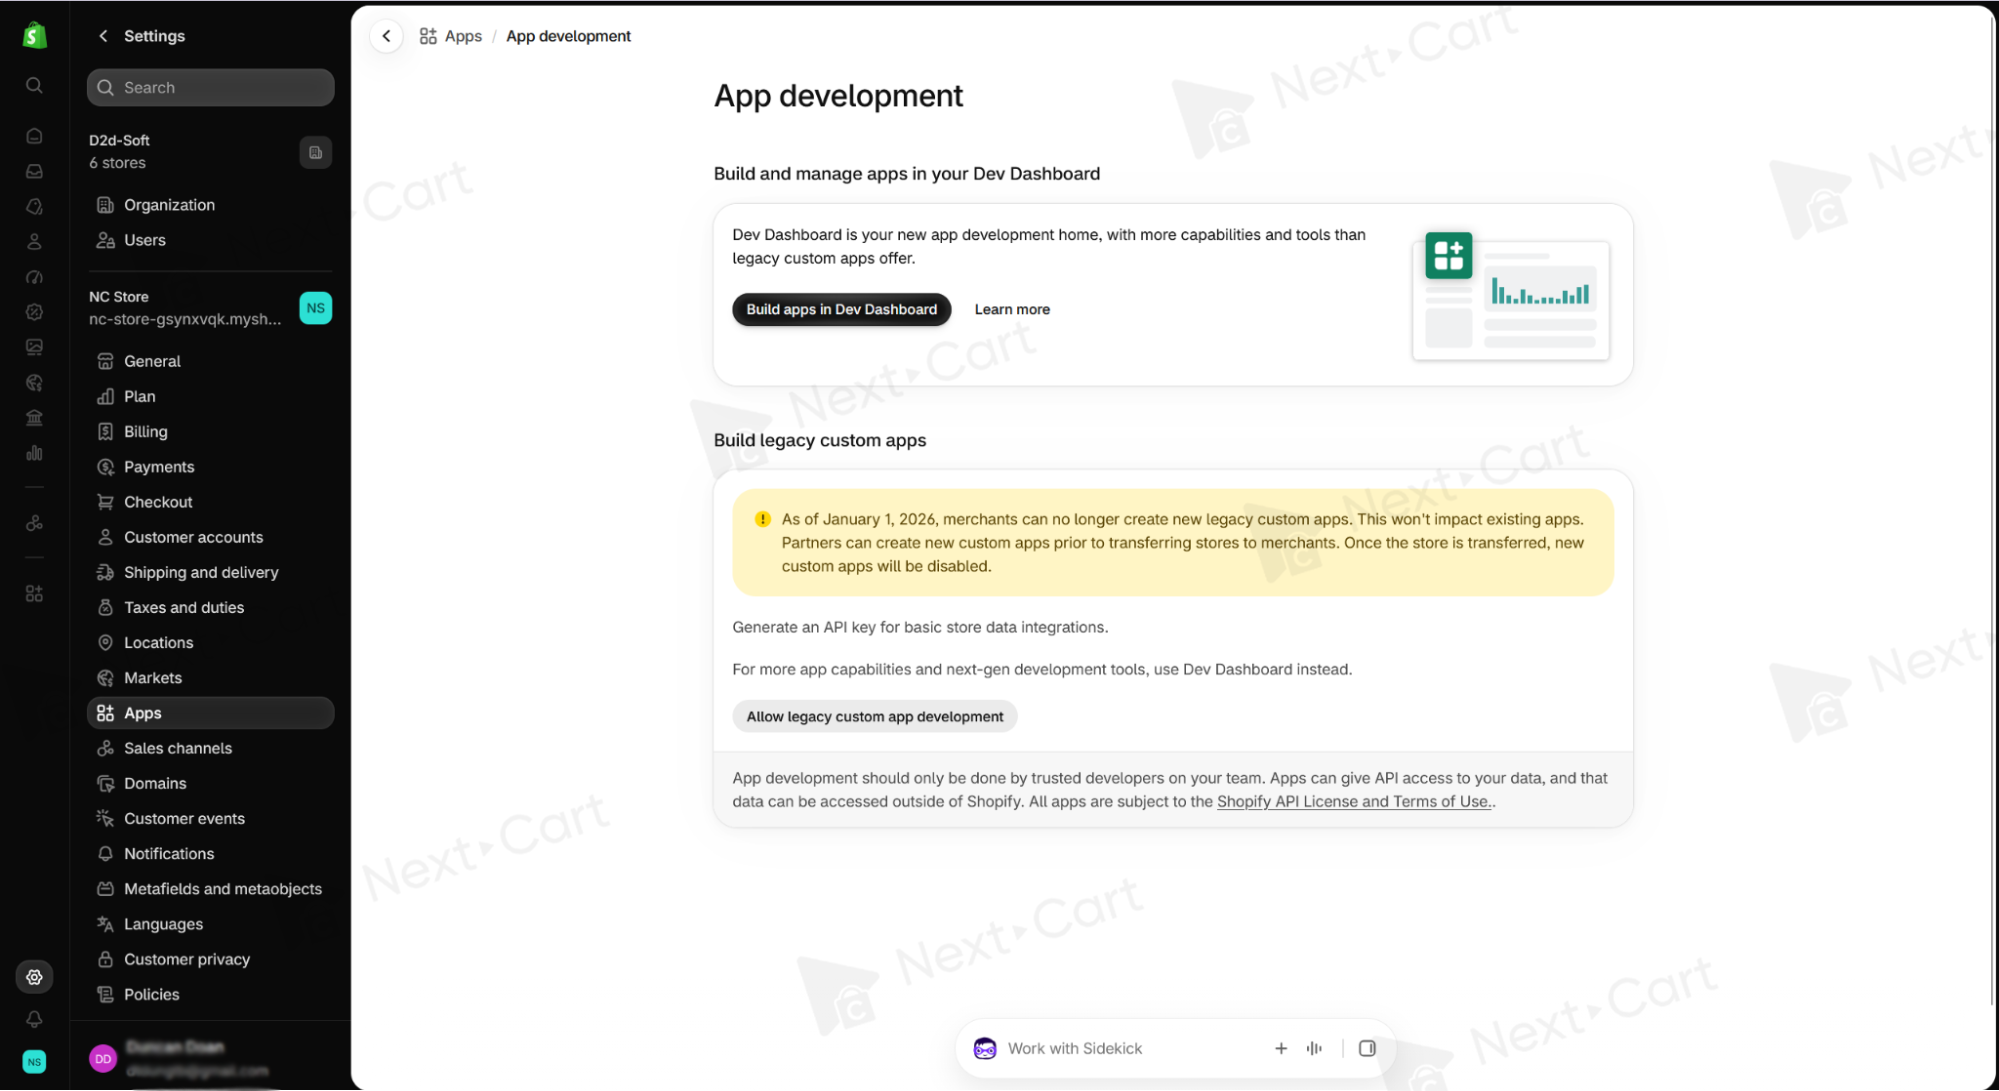
Under App development, select Build apps in Dev Dashboard.
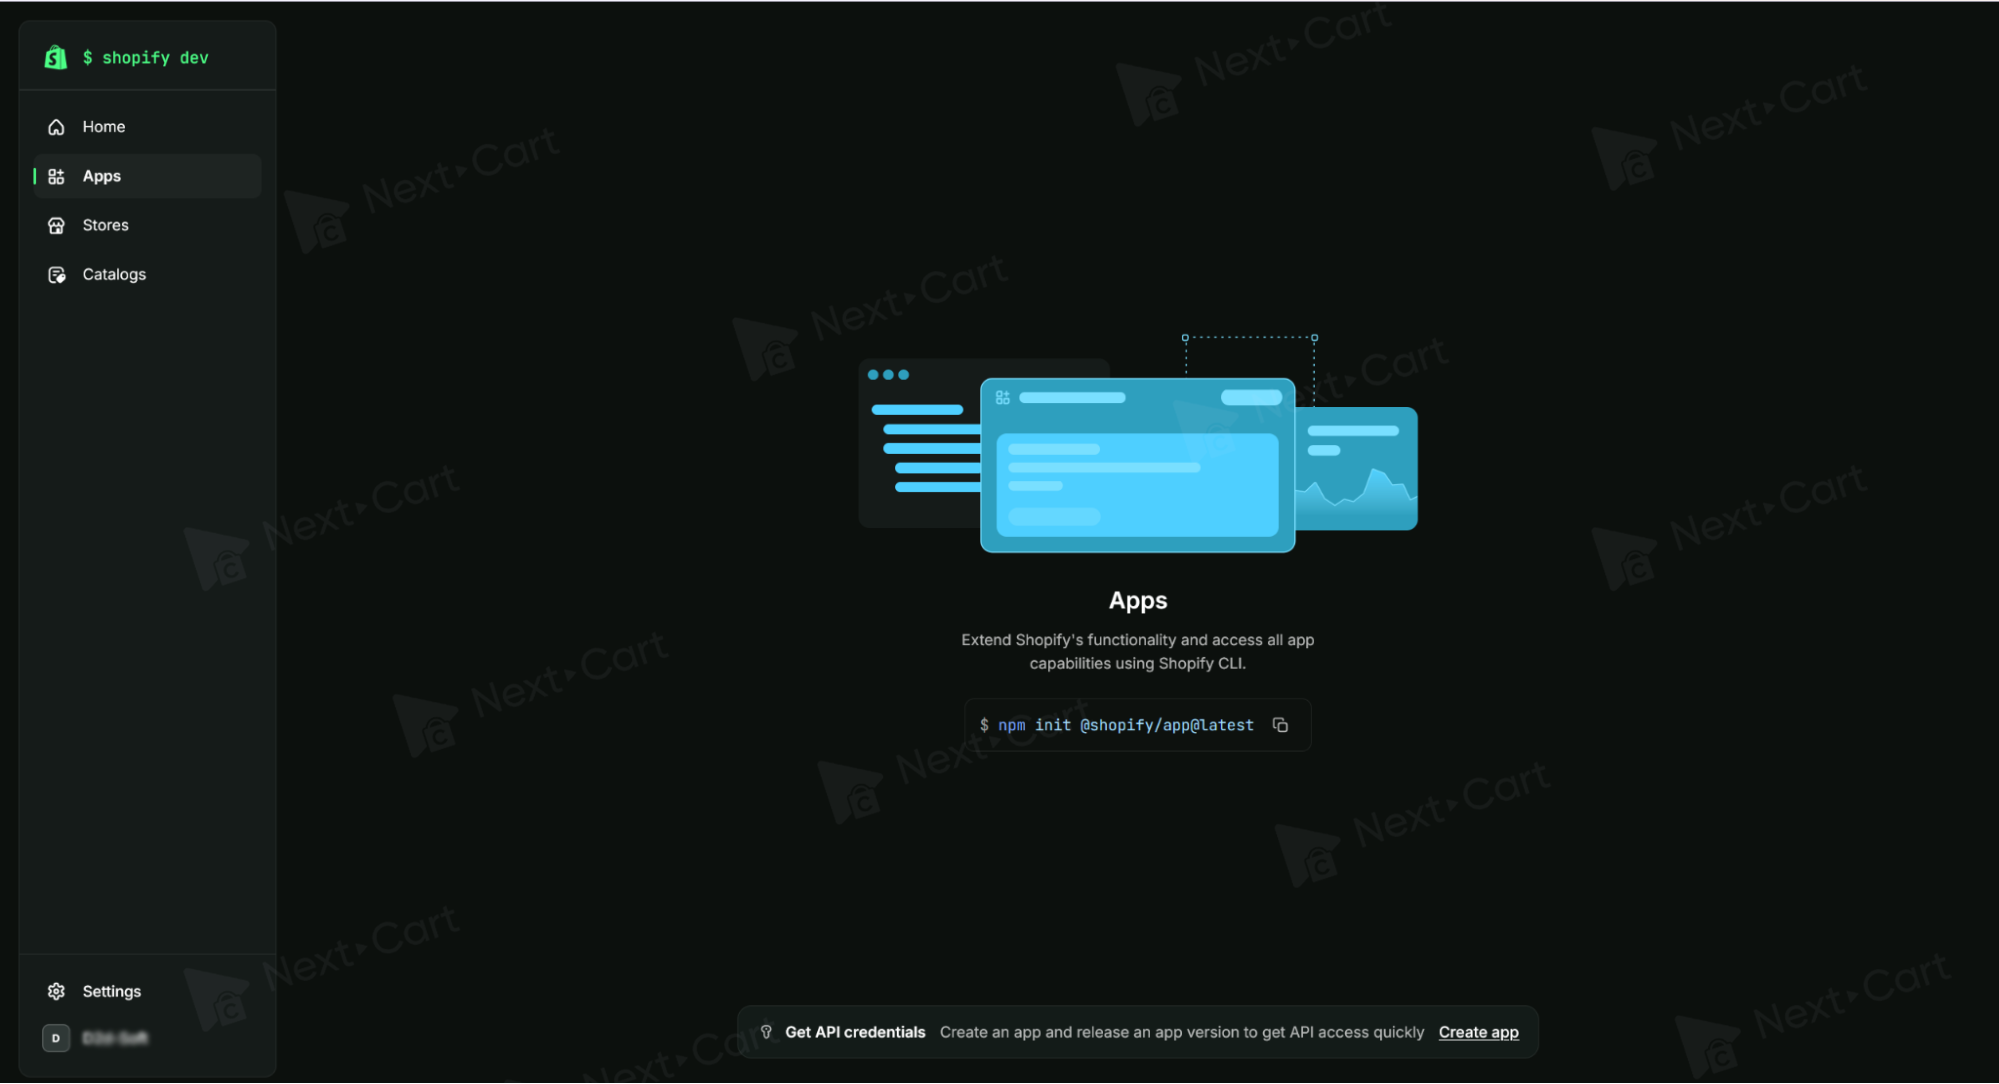
In the Dev Dashboard, select Create app.
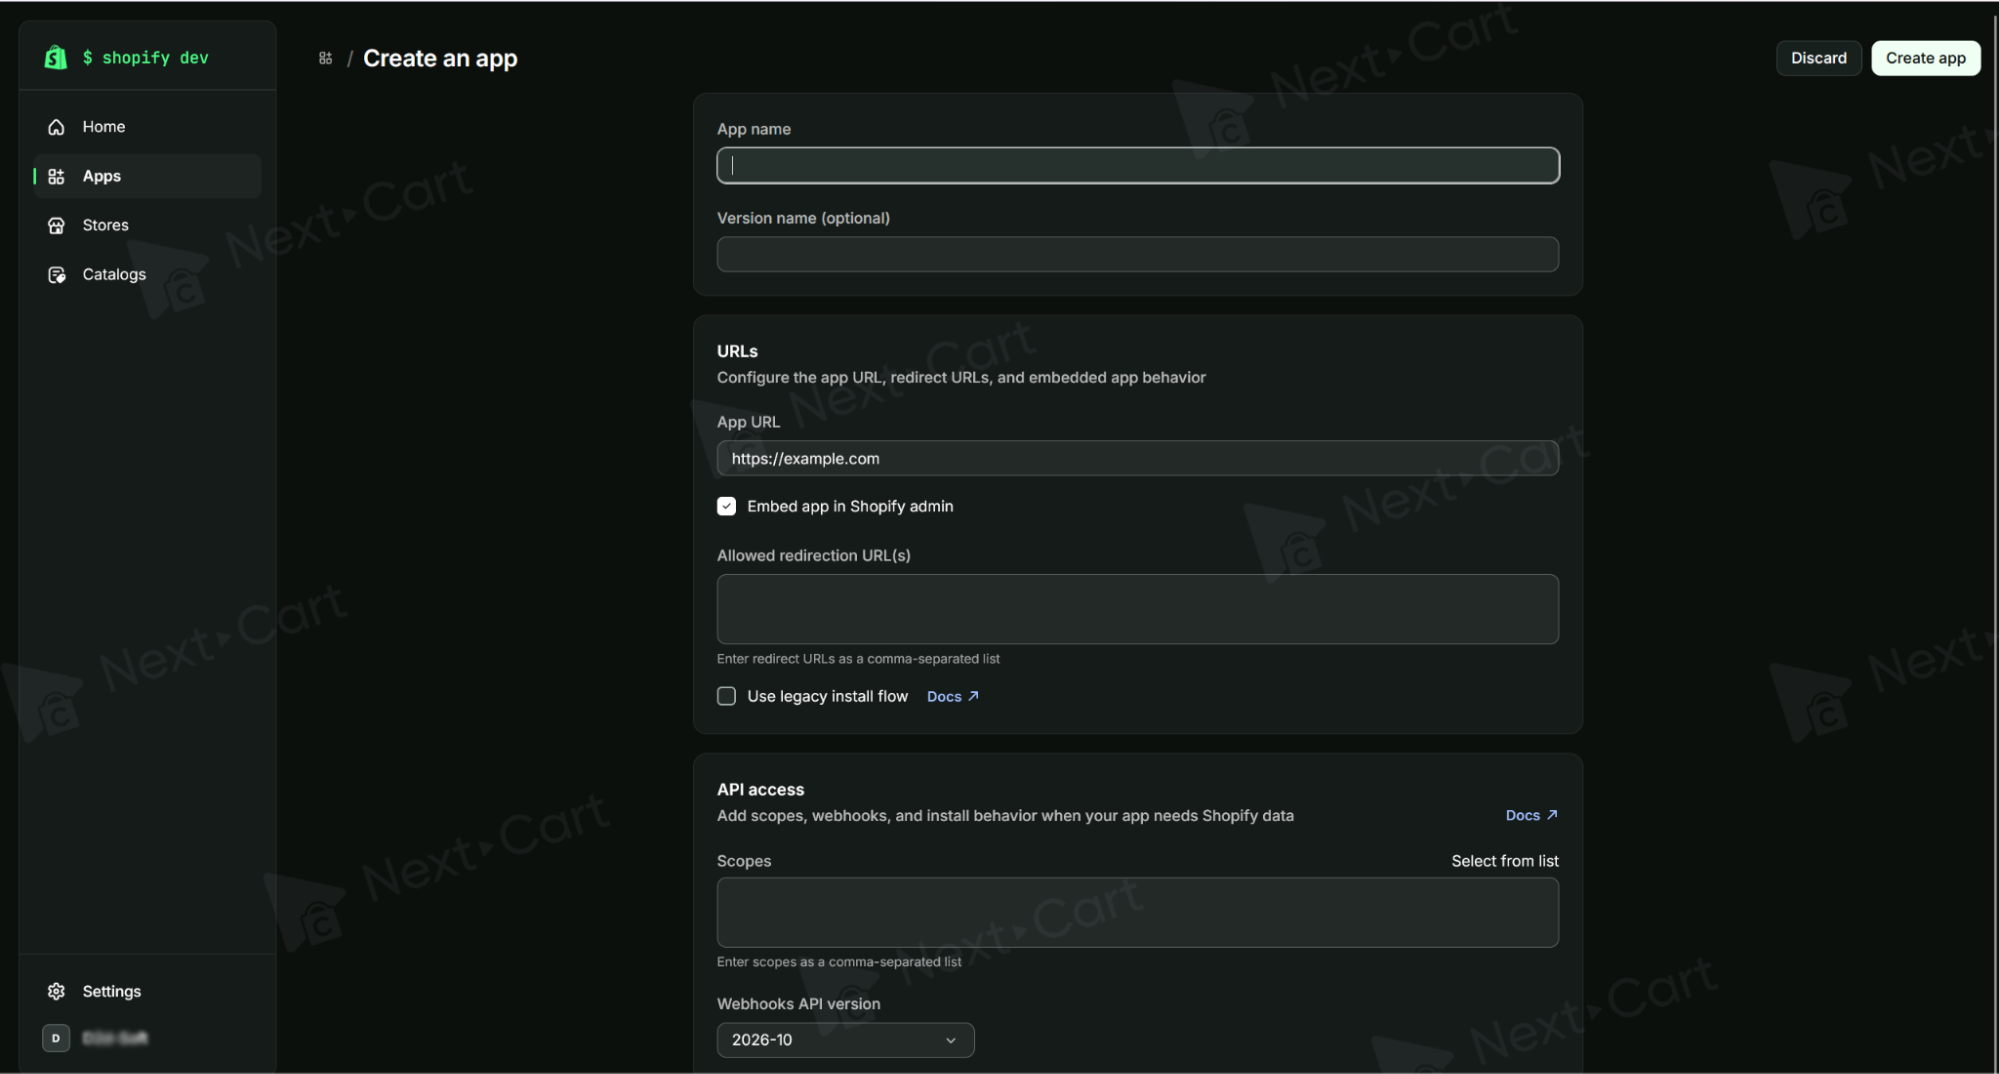
On the Create an app screen, choose an App name that will remind you what the app is for when you return to manage it. Complete the configuration details before moving on to access permissions.
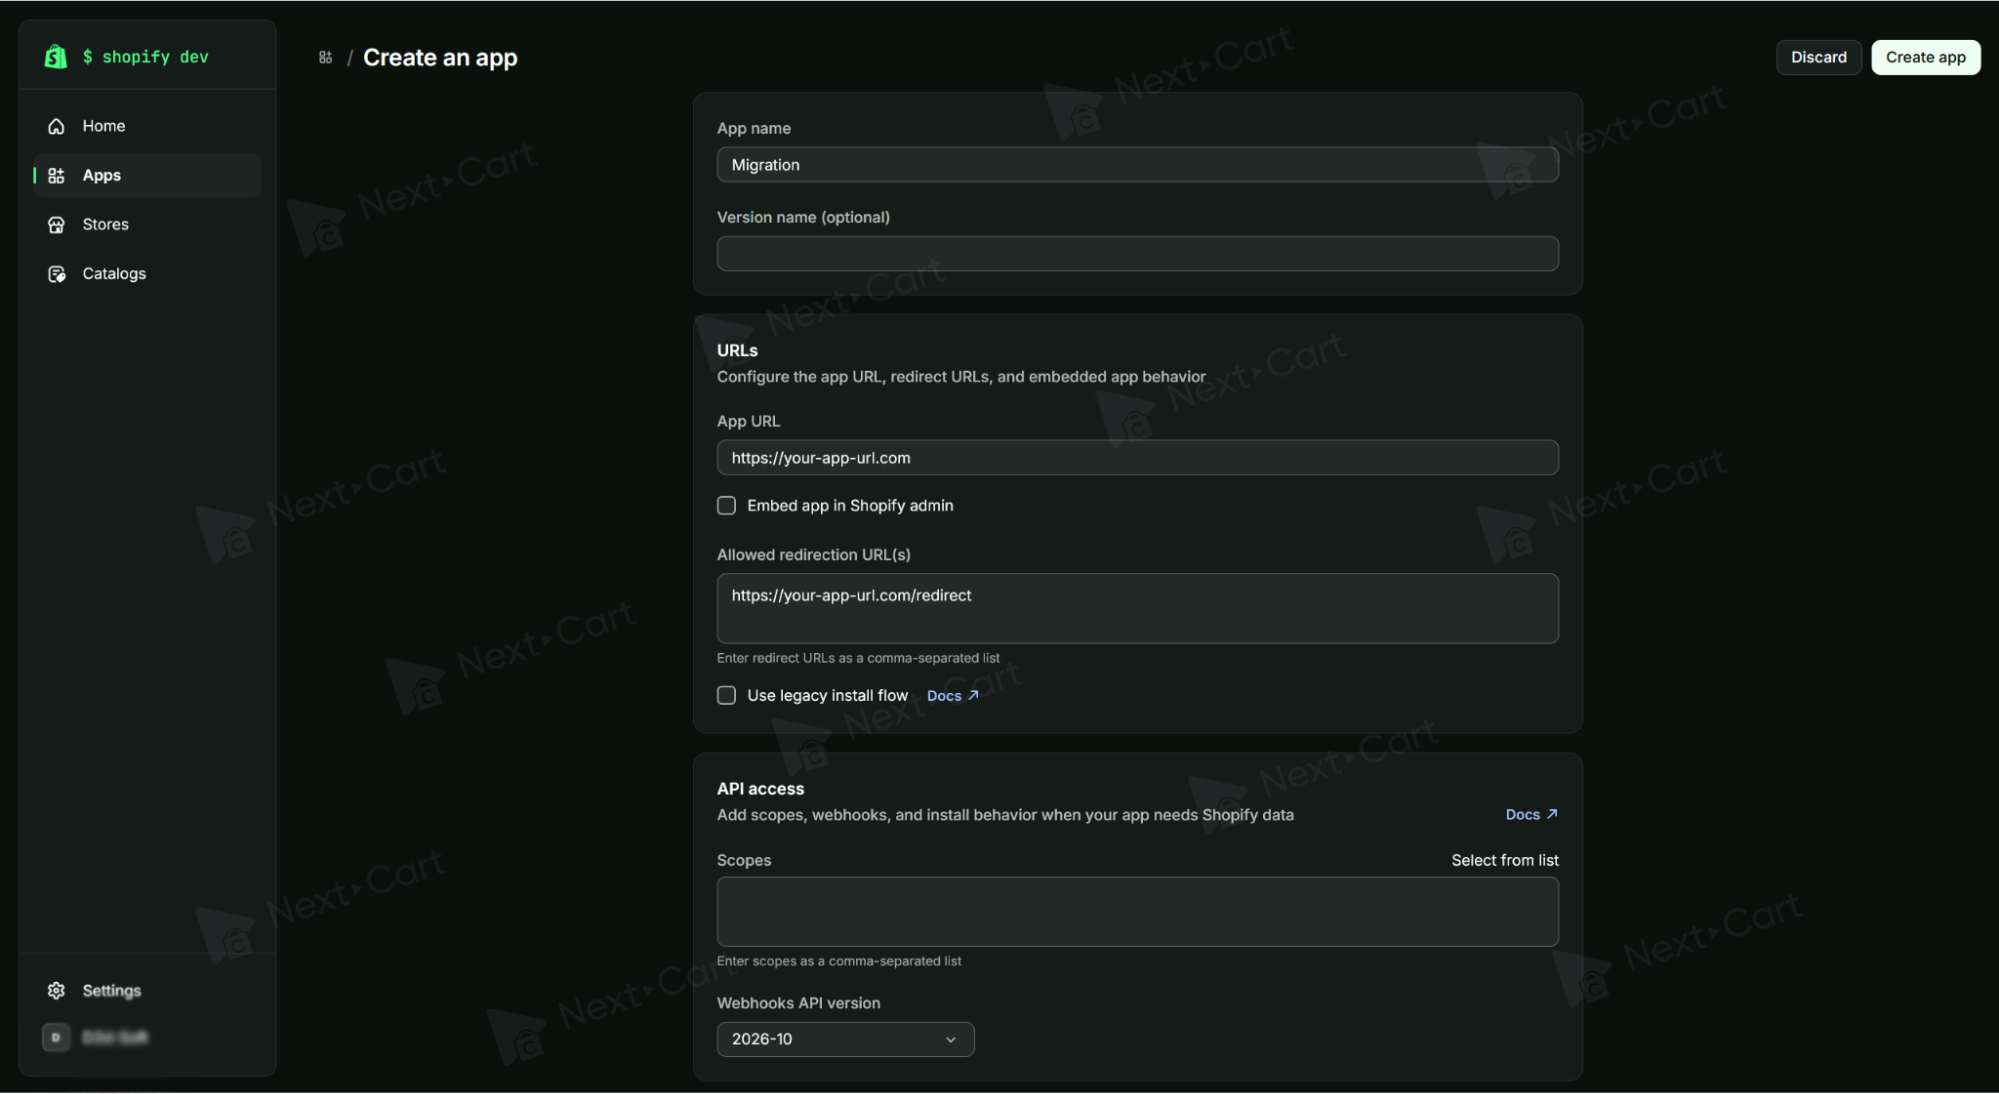
After entering the app details, find API access and select Select from list.
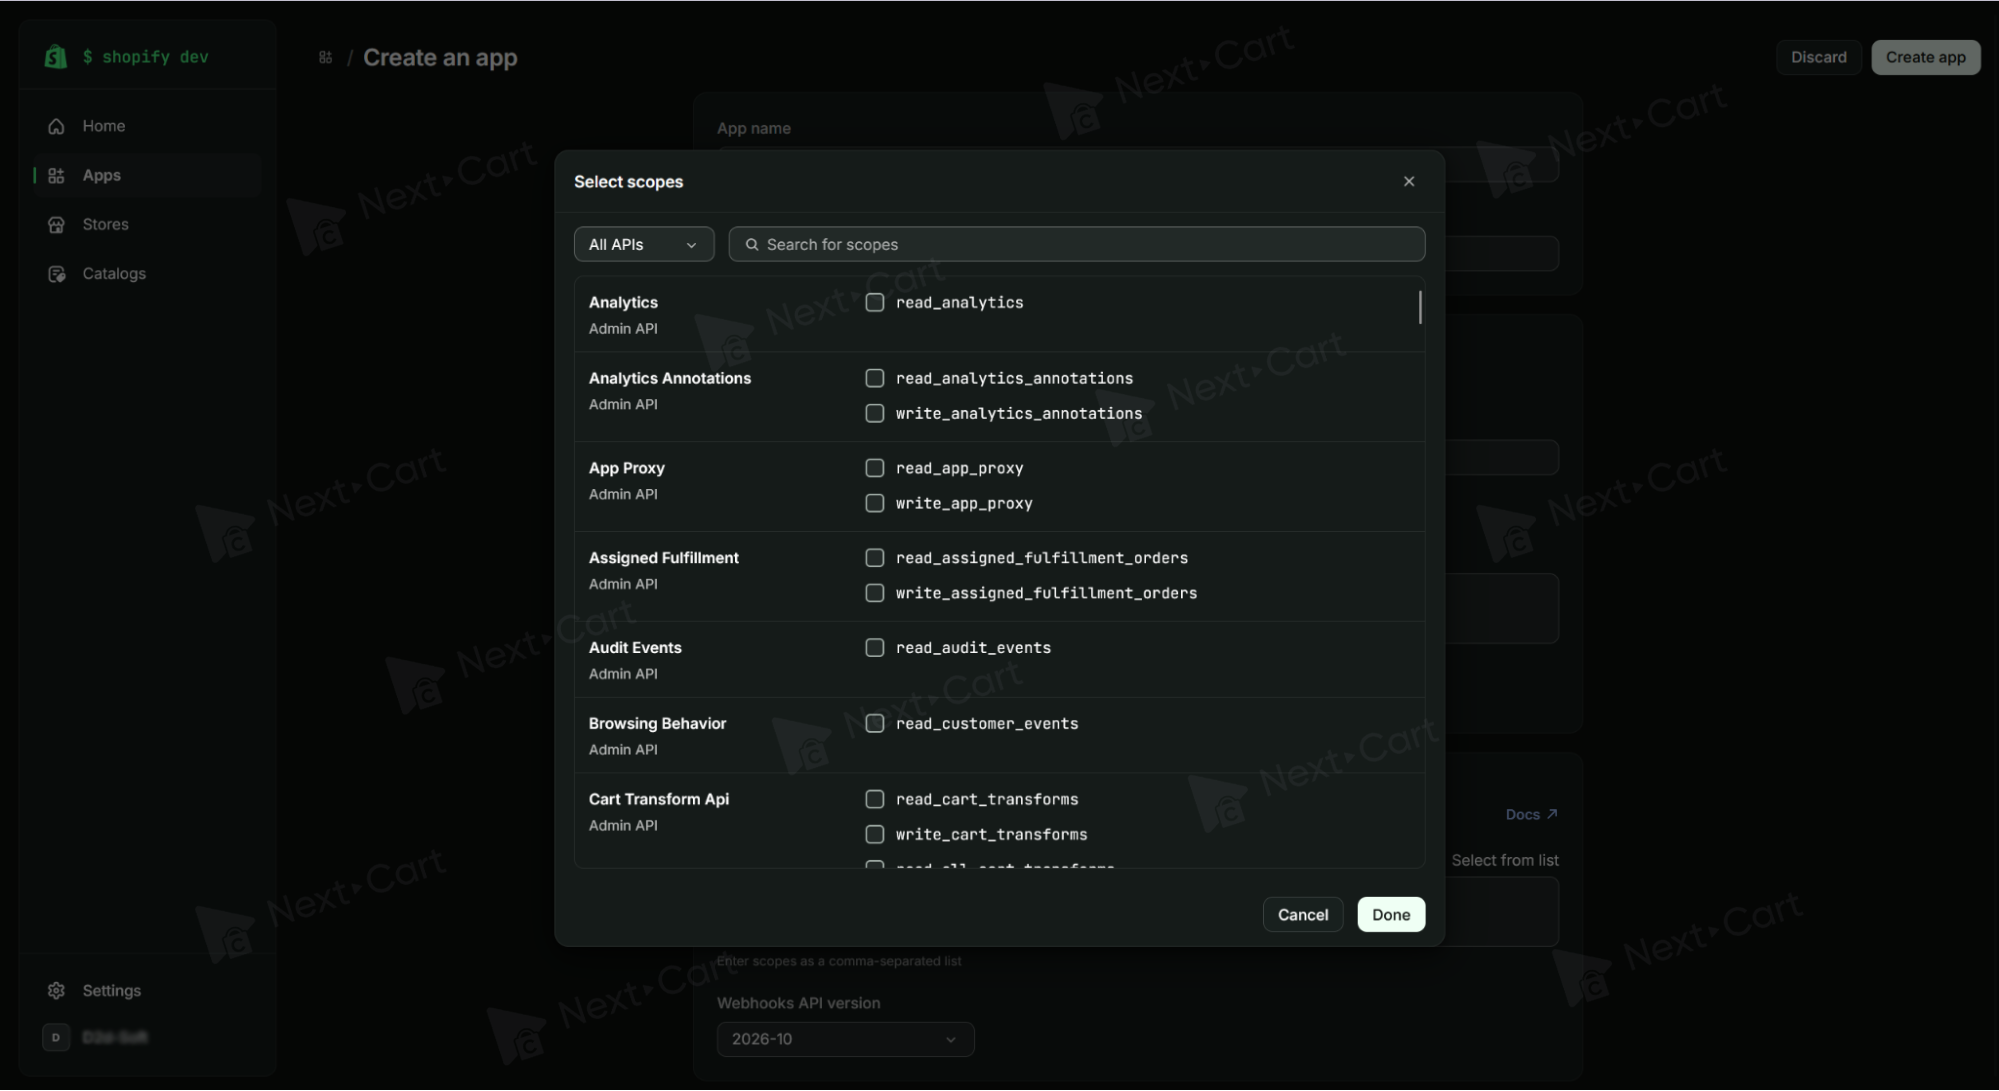
The scope list shows which permissions the app can request. For the product query in this guide, select read_products. Other permissions visible in the demo screenshot are not required for this query.
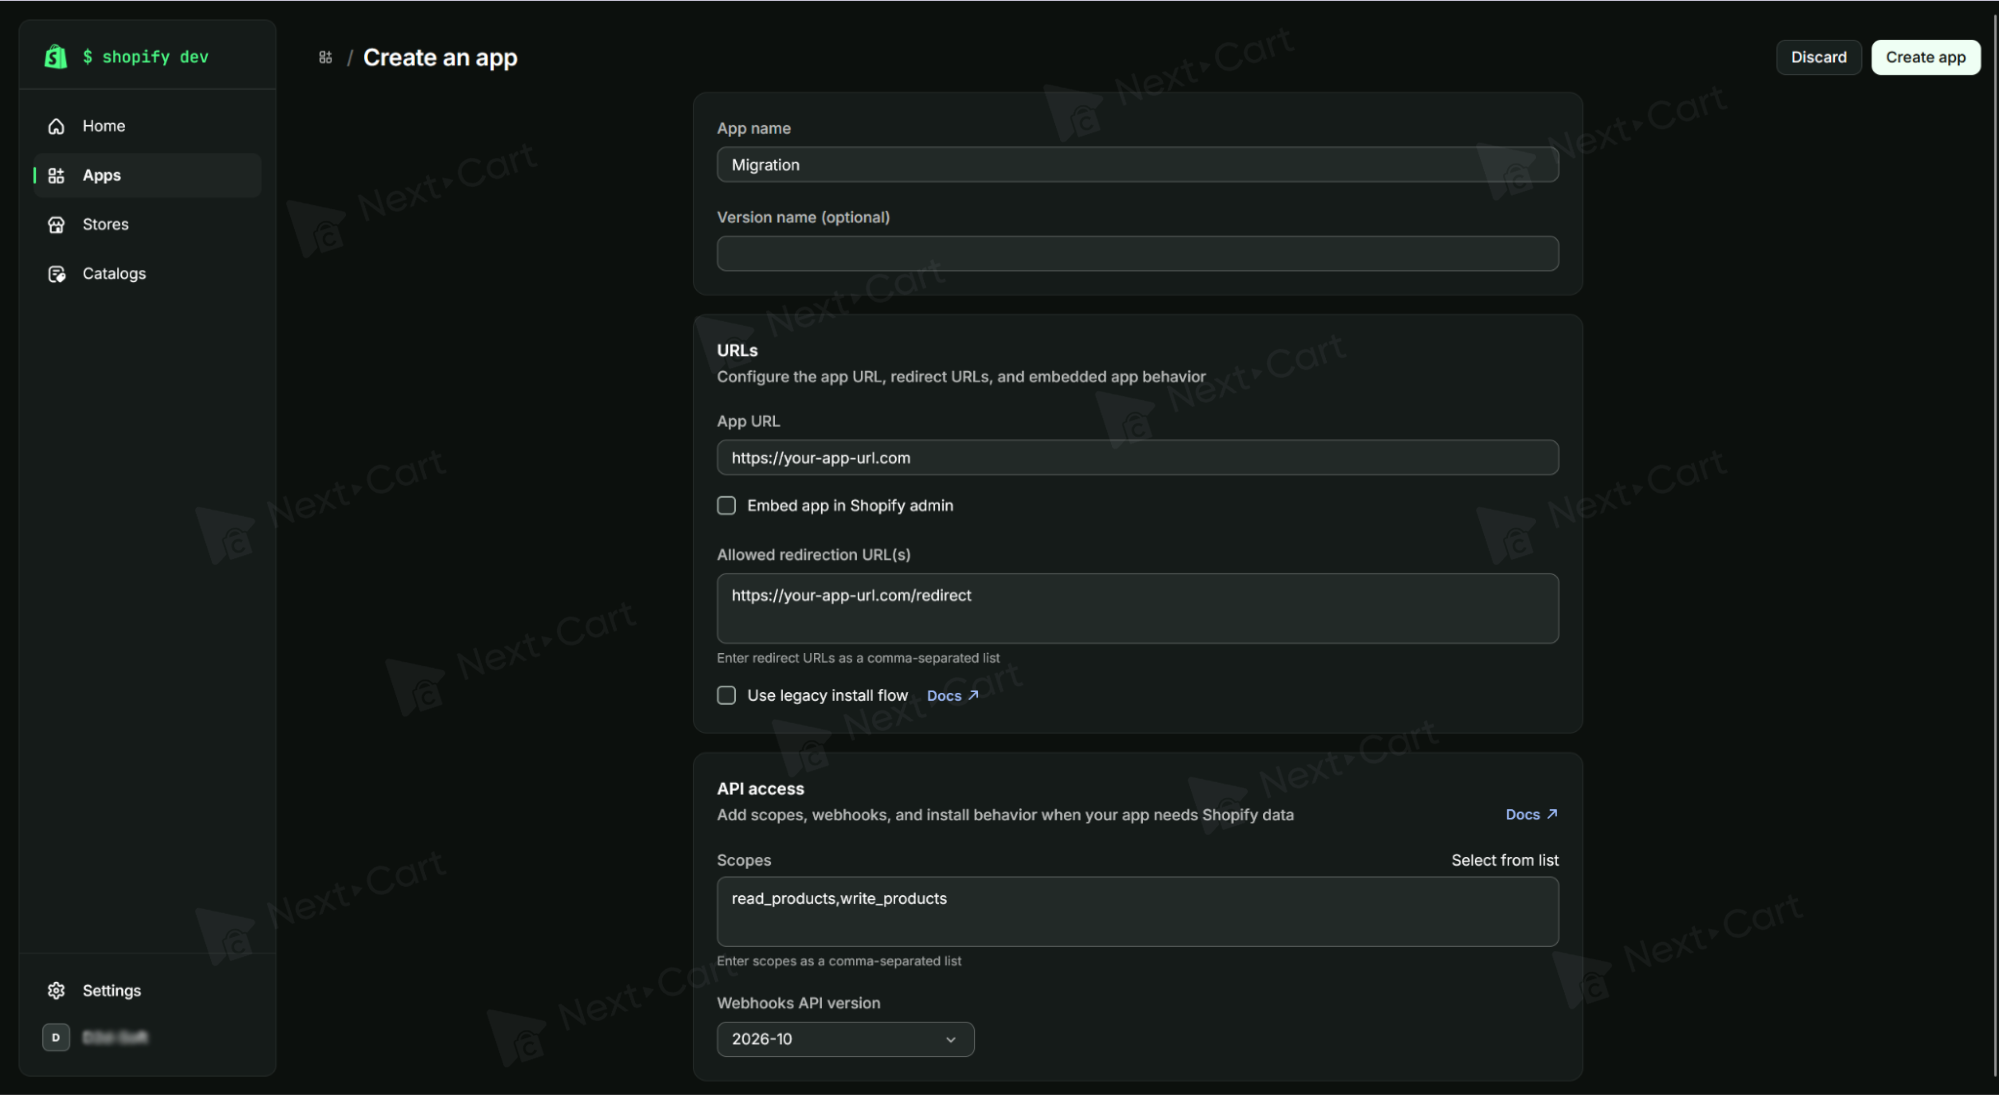
Review the name, configuration, and scopes, then select Create app in the upper-right corner.
In the confirmation dialog, select Release to release the app configuration version.
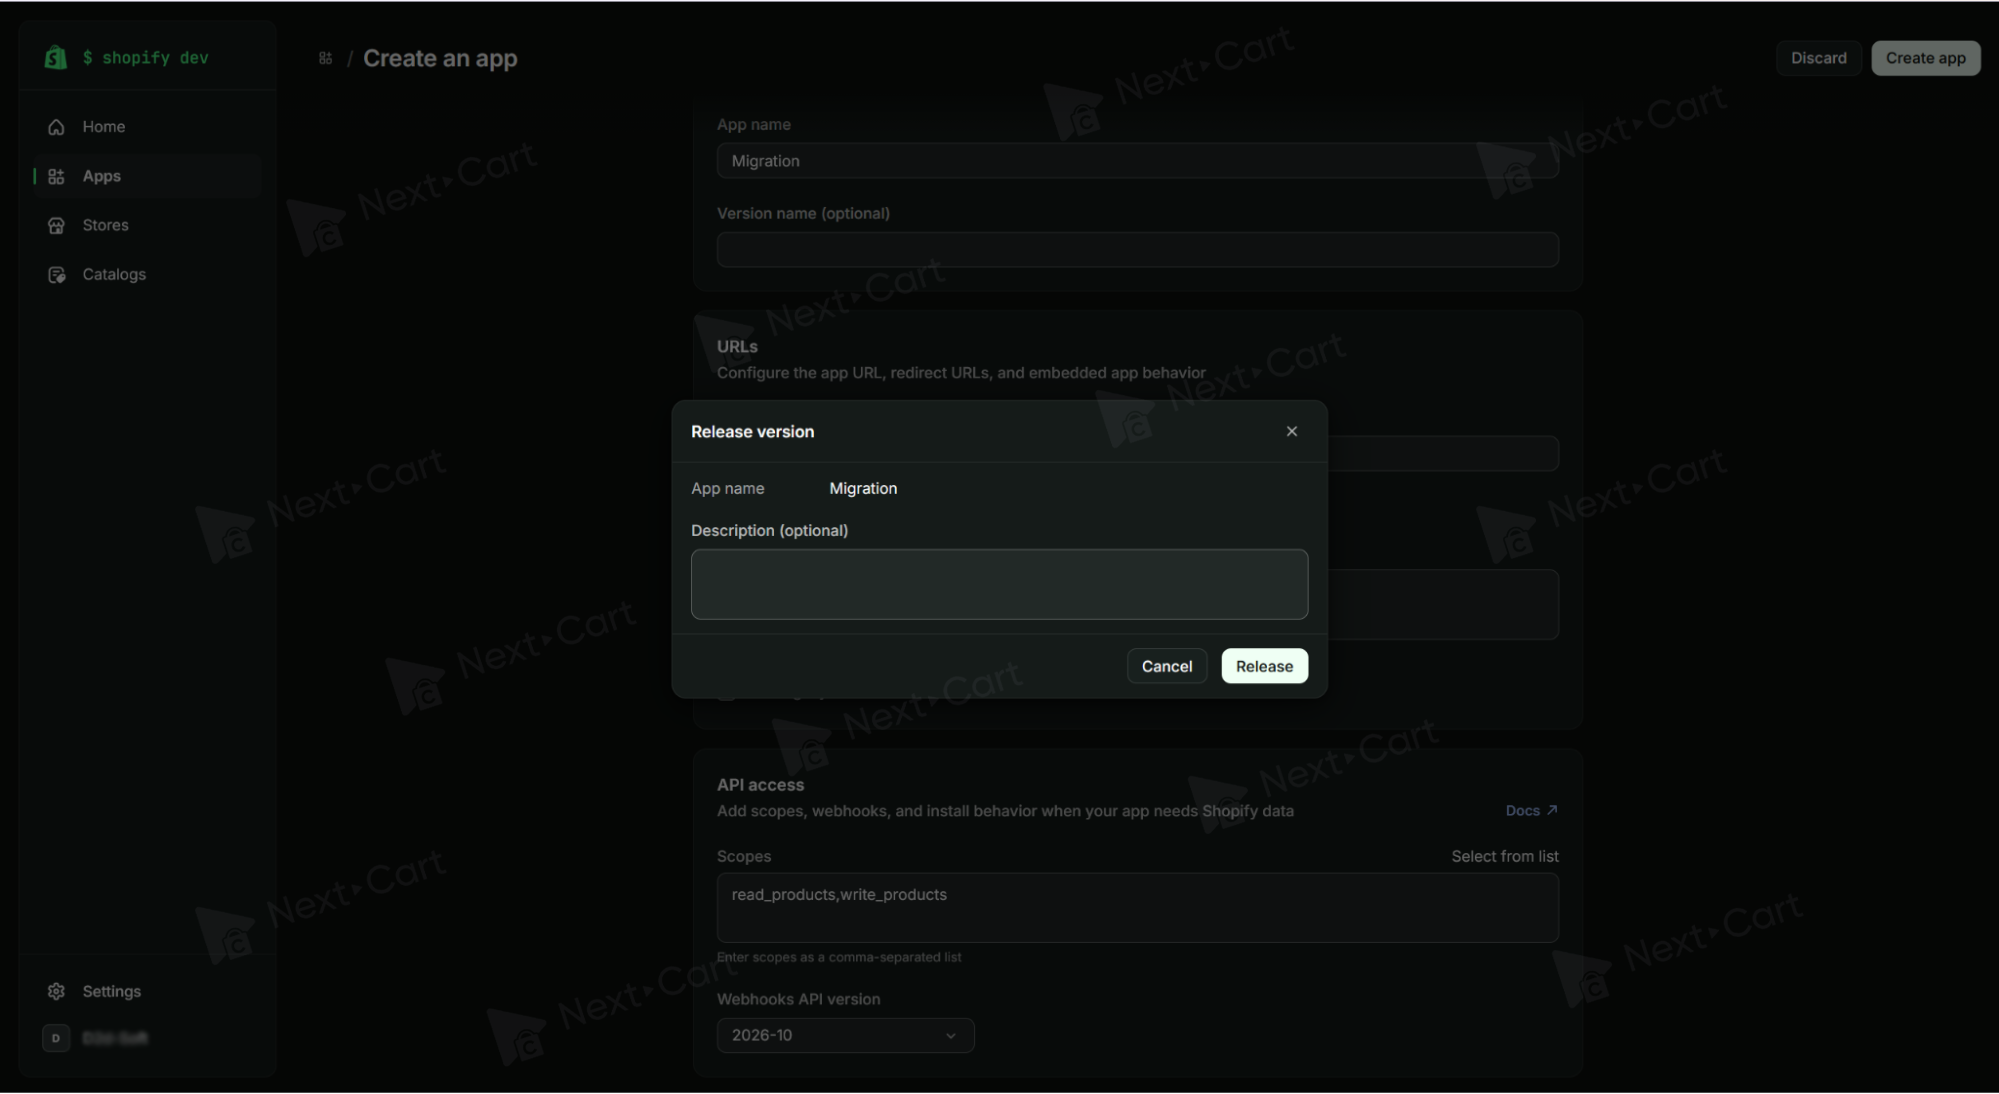
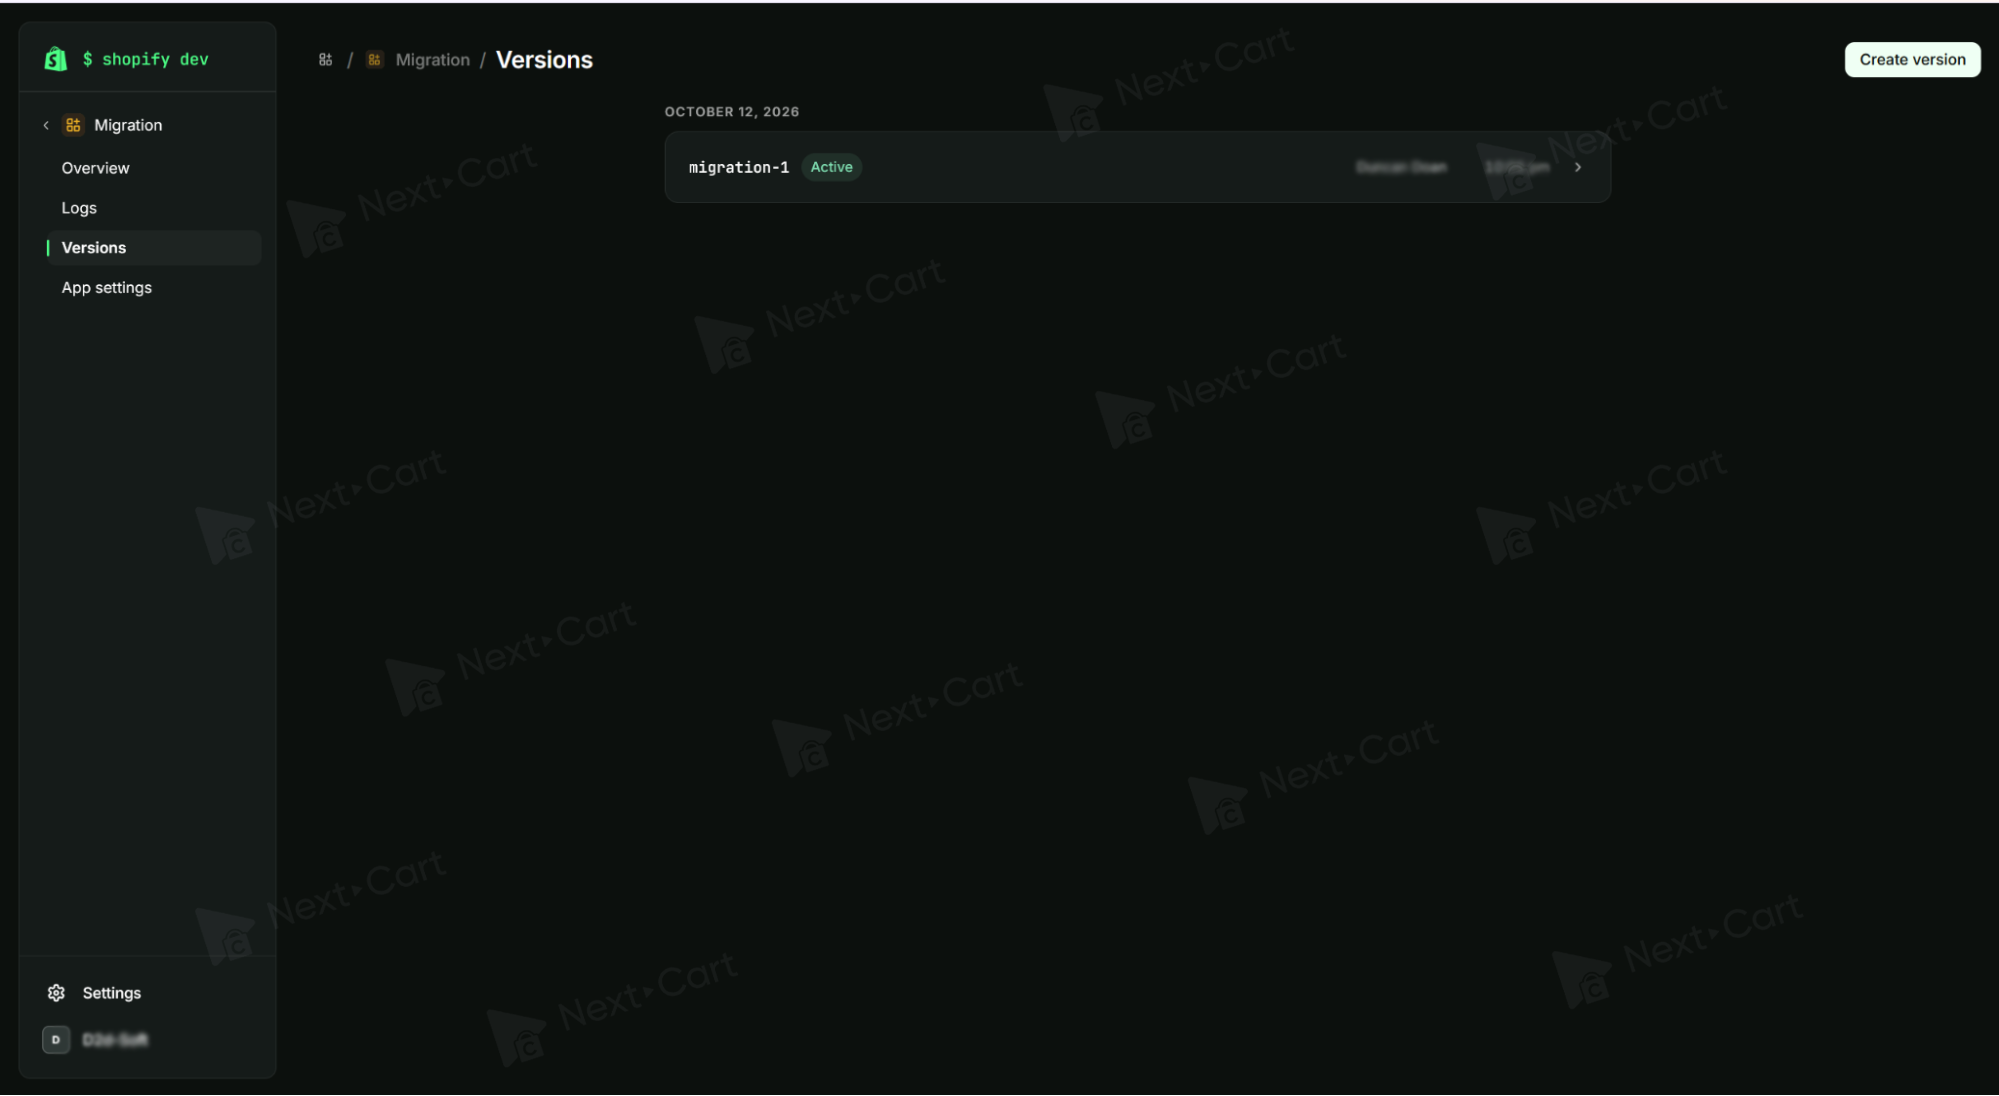
Find credentials and install the app
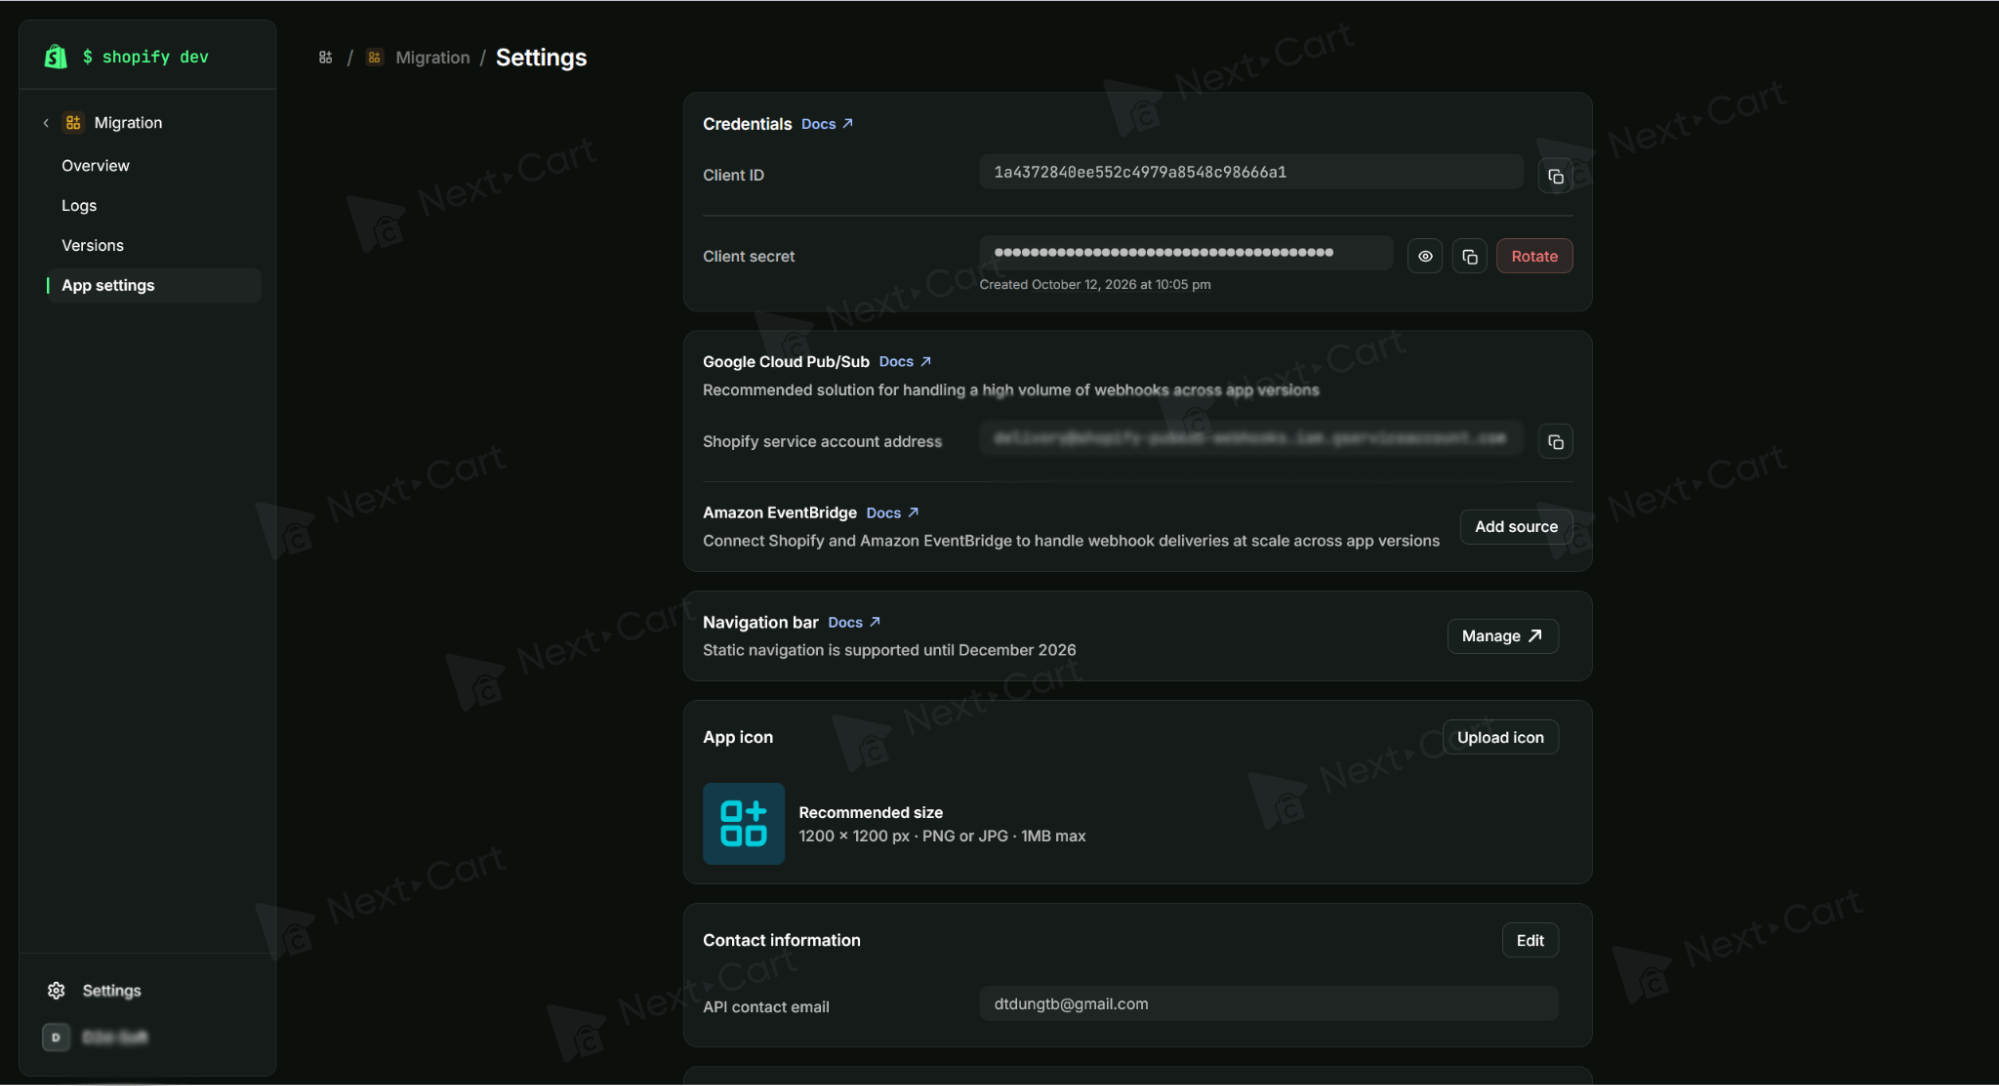
With the version released, select Settings in the sidebar to find the app’s credentials.
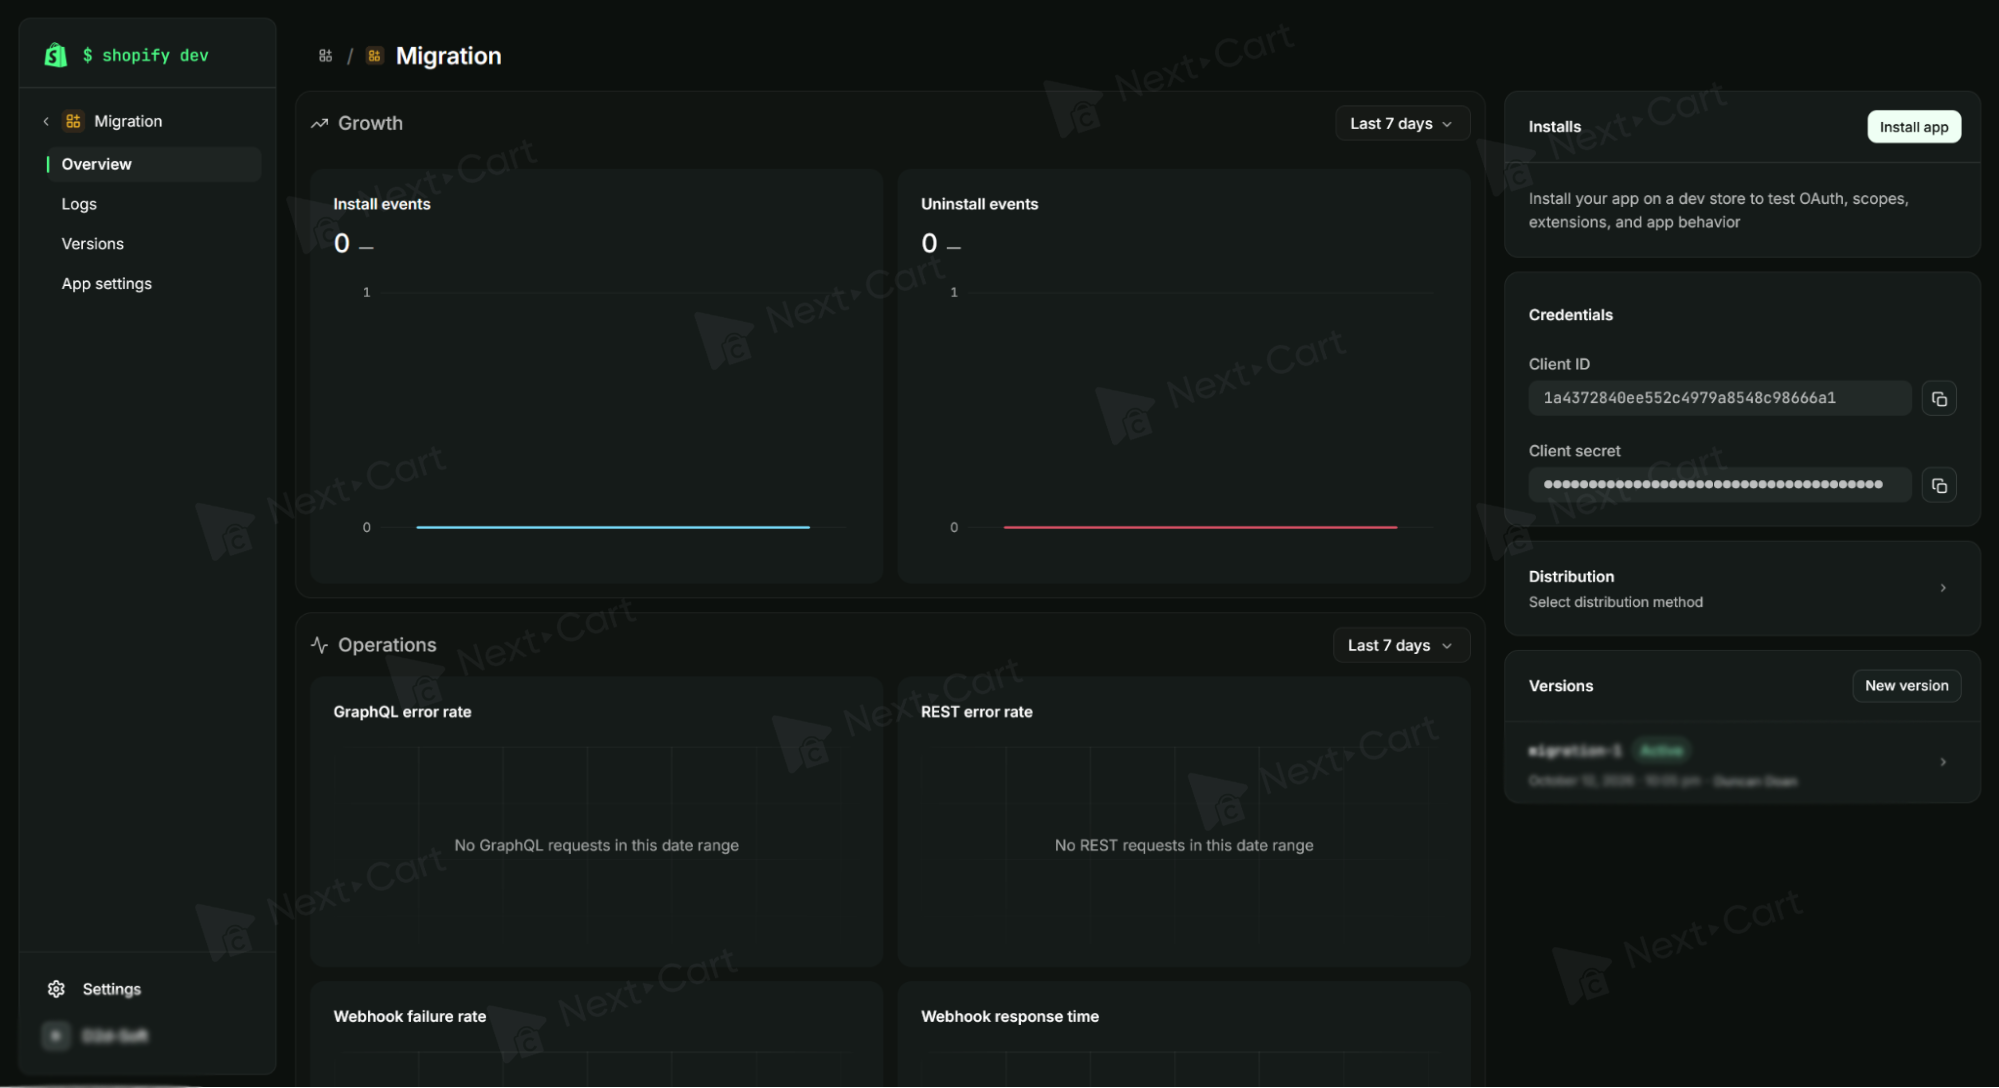
In Settings, locate Client ID and Client secret. Store these values privately for the token request, then open Overview.
In Overview, select Install app. Creating an app does not install it automatically: it needs to be installed on the store before it can access that store’s data.
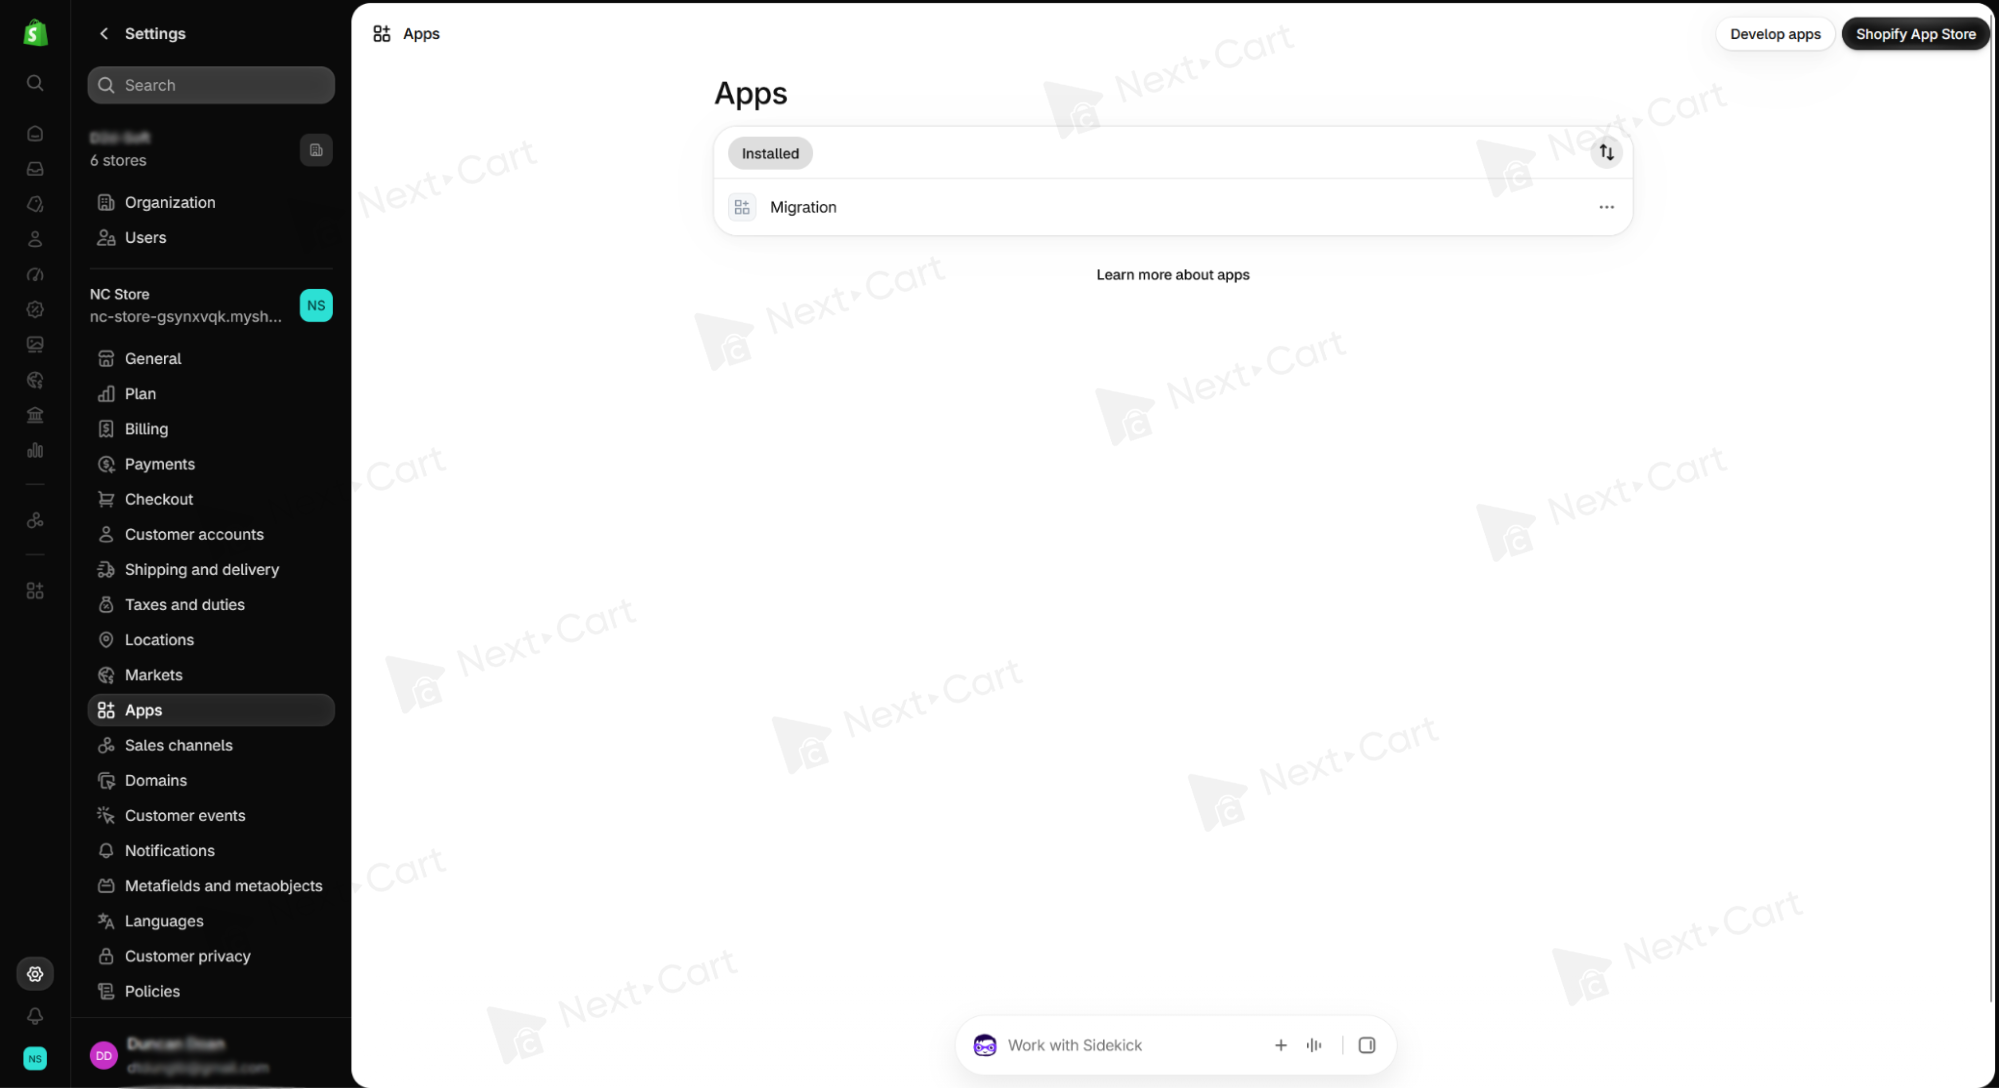
Choose the store you want to connect. The screenshot uses NC Store; select your own store when following along.
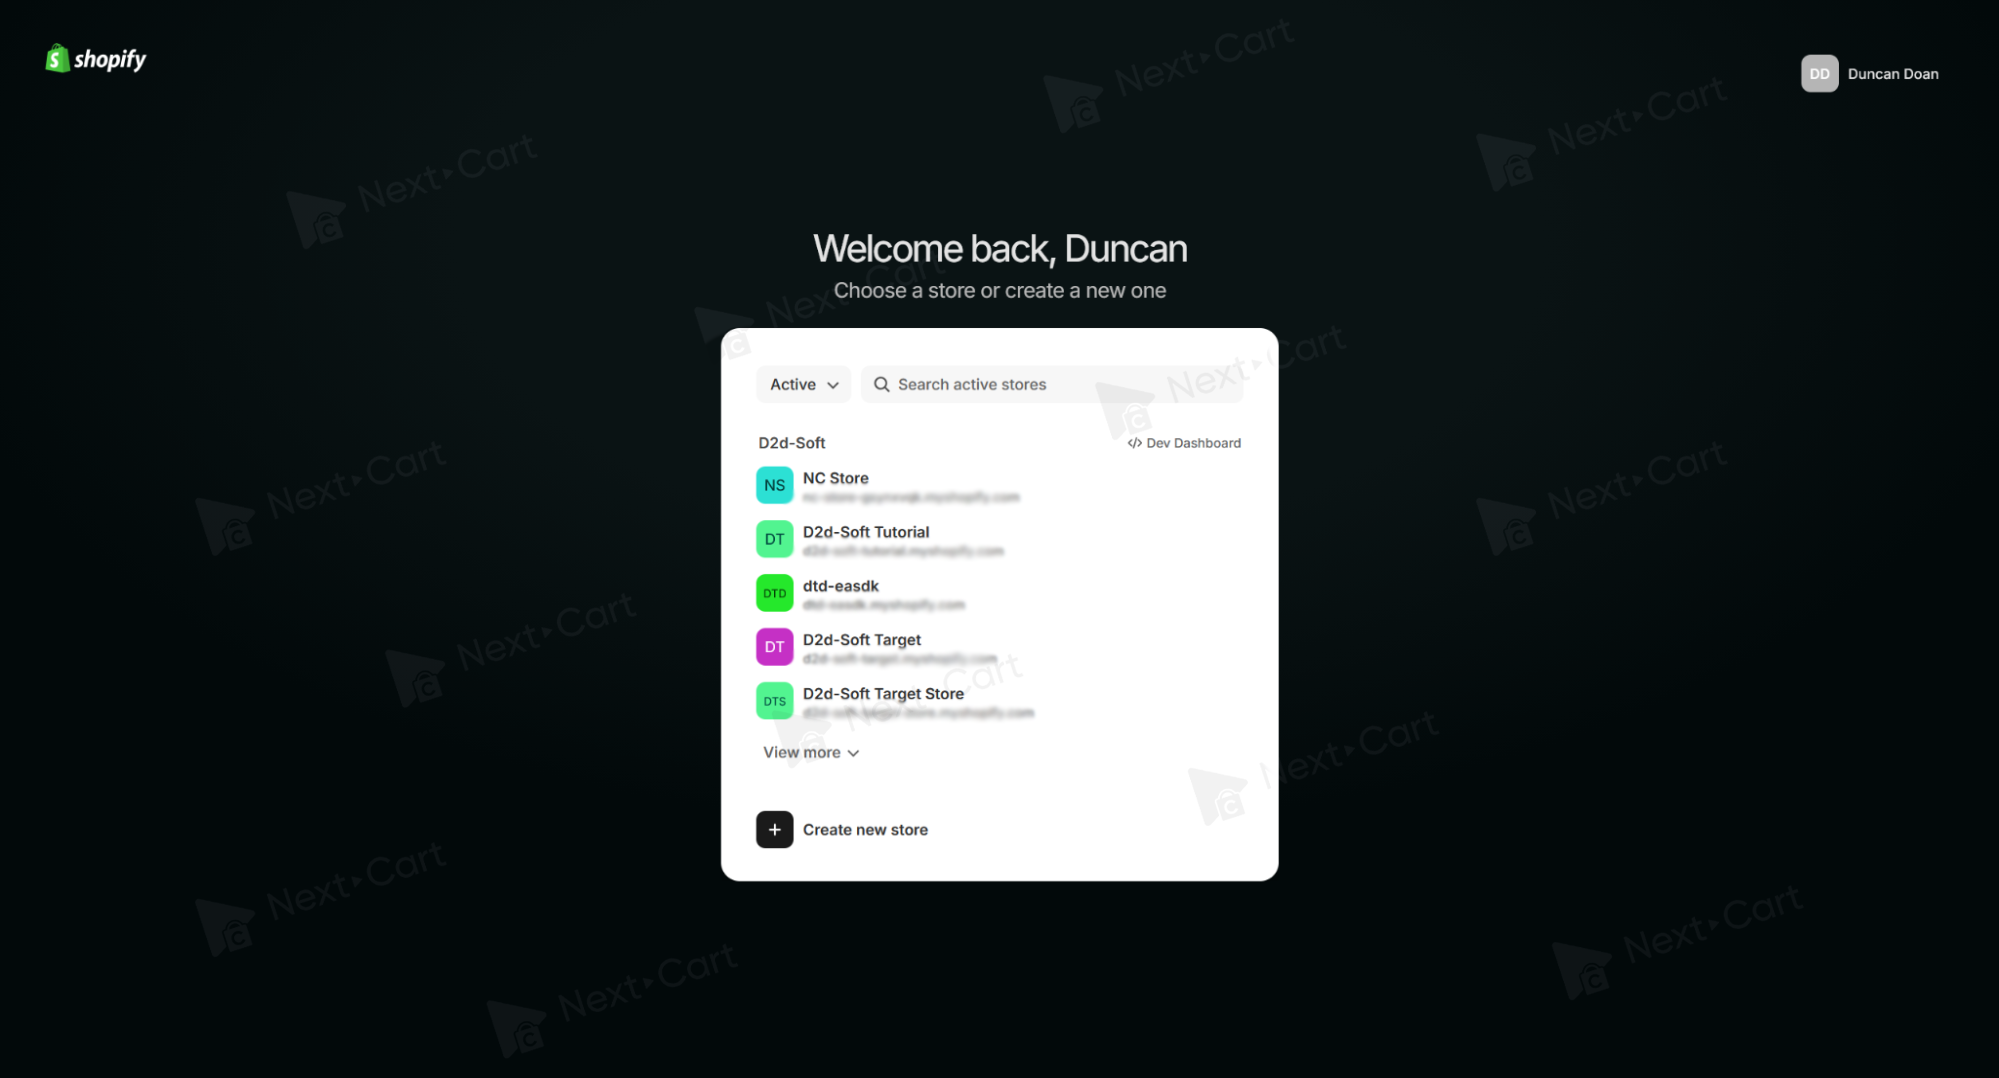
Shopify opens the Install app screen for the selected store. Check the app name and permissions, then select Install.
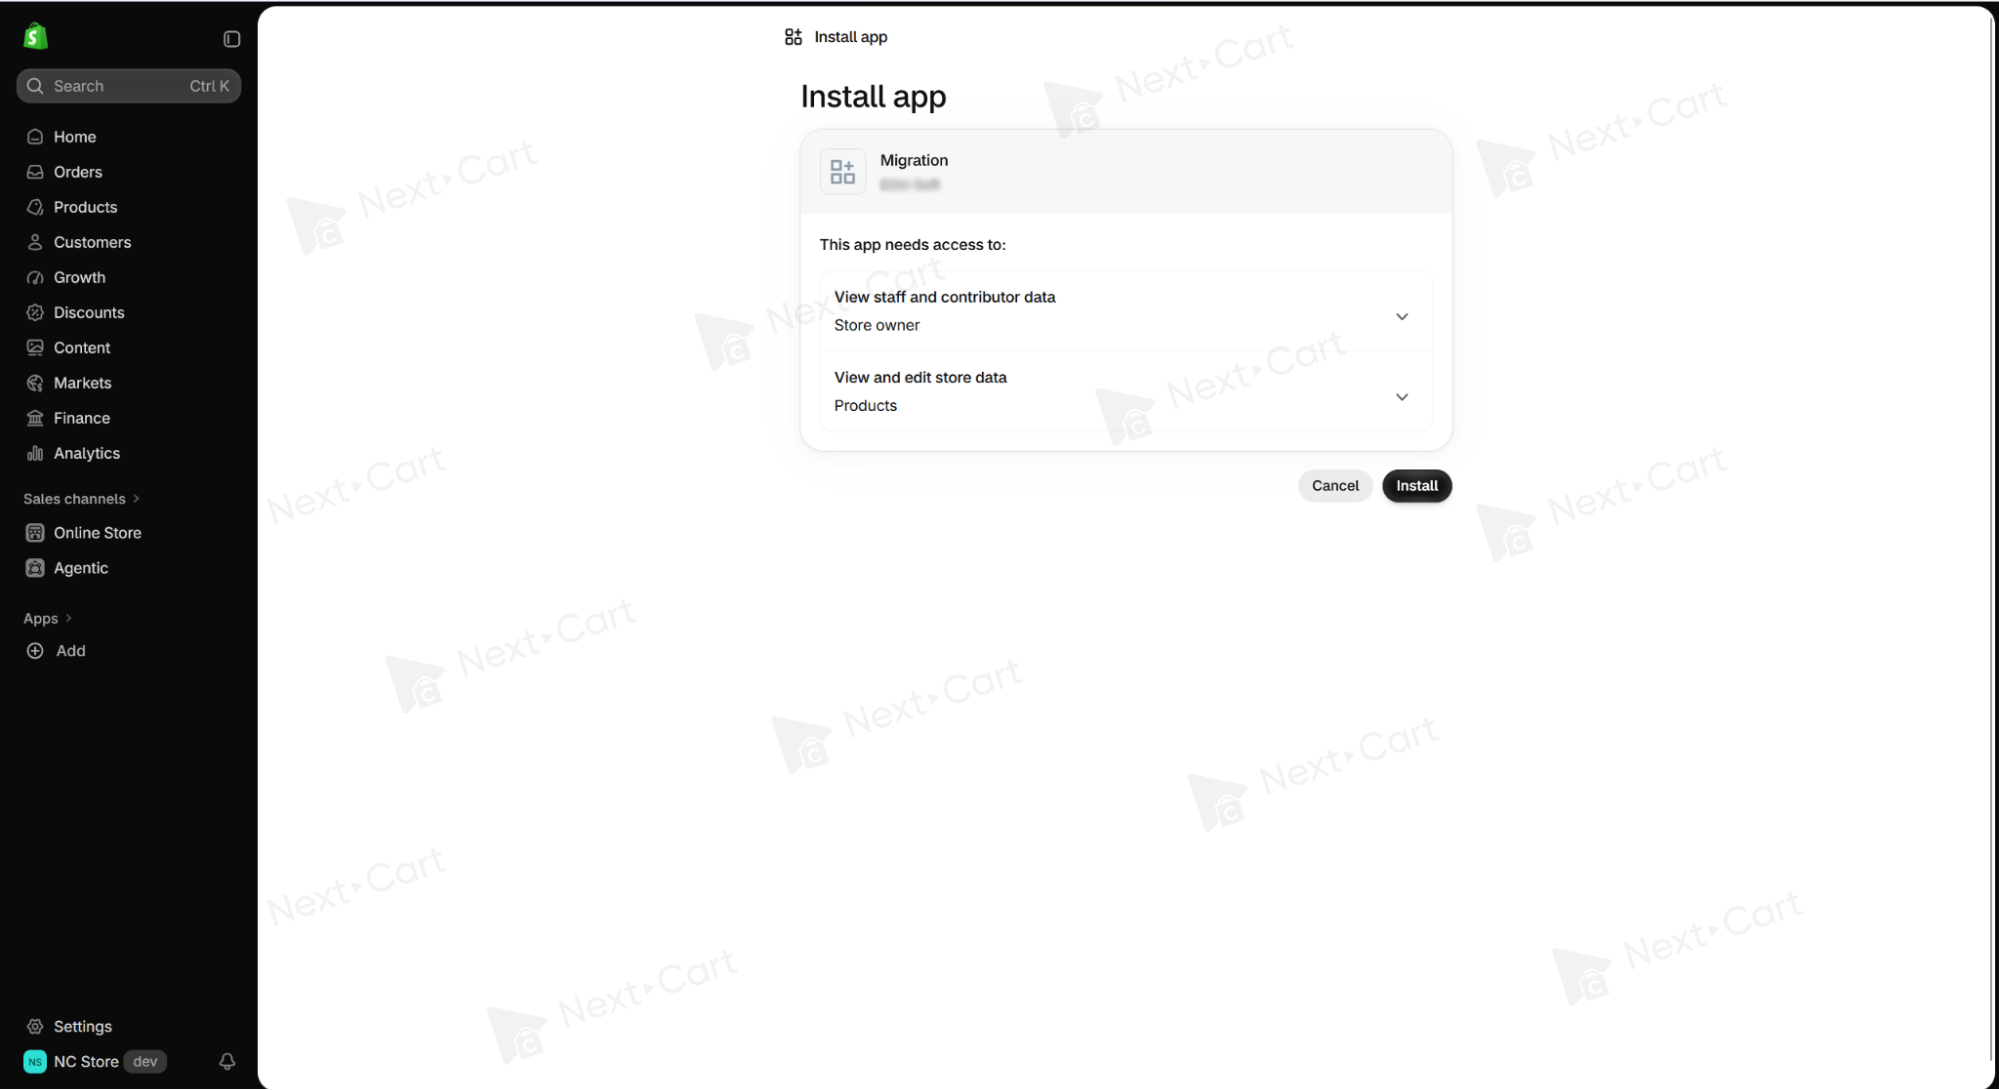
When the app appears in the store’s Apps list, installation is complete. You are ready to request an access token in Postman.
Request an access token
Create a POST request to:
https://{store}.myshopify.com/admin/oauth/access_tokenIn Body, select x-www-form-urlencoded and enter:
| Key | Value | Value type |
|---|---|---|
grant_type |
client_credentials |
Fixed for this grant |
client_id |
your app’s Client ID | App-specific value |
client_secret |
your app’s Client secret | App-specific private value |
Replace {store} with your store’s myshopify.com subdomain, then select Send.
The token response includes access_token, scope, and expires_in.
access_token- Use this value in Step 2.
scope- The access scopes granted to the token.
expires_in- The token’s lifetime in seconds when issued; record the issue time to calculate when it expires.
In this flow, obtain a new token by repeating the request with the client ID and client secret. There is no refresh_token to use.
Step 2. Retrieve product data in Postman
With access in place, you can now request product data from the store. The query determines which fields Shopify returns and how many products appear on each page. We will first look at the request structure, then follow the two requests that returned all 17 products from our Test Store.
Configure the request
Create a new request named Get Shopify products. Select POST and enter:
https://{store}.myshopify.com/admin/api/2026-10/graphql.jsonReplace {store} with the subdomain from the store’s myshopify.com address. In Headers, add the following values, then choose Body → raw → JSON.
| Header | Value |
|---|---|
X-Shopify-Access-Token |
The access_token obtained for this store in Step 1. |
Content-Type |
application/json |
Authentication prerequisite
The app must be installed on the store and have product read access. The client credentials grant used in Step 1 applies when the app and store belong to the same Shopify organization. Send the access token in the product request, not the client ID or client secret.
Understand the query structure and editable values
This reusable JSON body uses GraphQL variables to keep editable inputs separate from the query. For the first page, leave after as JSON null. Set pageSize to the number of products to request, up to 250.
{
  "query": "query ReadProducts($pageSize: Int!, $after: String) { products(first: $pageSize, after: $after) { edges { node { id title handle status vendor productType createdAt } } pageInfo { hasNextPage endCursor } } }",
  "variables": {
    "pageSize": 250,
    "after": null
  }
}
The JSON query property contains the GraphQL operation; variables supplies its inputs. $pageSize: Int! declares a required integer, and $after: String declares an optional cursor string. The variable names are chosen for this operation; their declarations, uses, and JSON keys must match.
| Element | What to edit or preserve |
|---|---|
{store} and access token |
Supply your store subdomain and a valid token for that store. |
| API version | Use 2026-10 consistently for this guide. Check the schema before adopting another version. |
variables.pageSize |
An unquoted integer from 1 to 250 for this retrieval. |
variables.after |
JSON null for the first page, or a quoted cursor string for a subsequent page. |
products, first, after, edges, node, pageInfo |
Schema field and argument names. Preserve their spelling, case, and valid nesting. |
id, title, handle, status, vendor, productType, createdAt |
The selected product fields. You may change the selection to valid fields; these seven are not all mandatory. |
| JSON quotes, braces, and GraphQL selection braces | Keep the request structurally valid. JSON has no comments or trailing commas. |
Retrieve additional product pages
The products connection returns up to 250 products per page. It can return fewer when fewer matching products remain. Pagination is needed whenever the results exceed the chosen page size. See Shopify’s GraphQL pagination guide.
| Argument or field | Role | How to use it |
|---|---|---|
first |
Maximum products requested in the current page. | Set the page size; it does not set the total number of products to retrieve. |
after |
Input cursor for forward pagination. | Omit it or use null for the first page. For the next page, use the preceding page’s endCursor. |
pageInfo.hasNextPage |
Whether another page follows the current one. | Continue when true; stop when false. |
pageInfo.endCursor |
Cursor for the final item in the returned page. | Read data.products.pageInfo.endCursor and pass it as after in the next request. |
- Send the first-page request.
- Inspect
errorsand confirm that the expected product data is usable. - If
hasNextPageistrue, copy that page’sendCursorintovariables.afterand resend the same query. - Collect the next page’s records and repeat with its new cursor until
hasNextPageisfalse.
Treat the cursor as an opaque value: copy it exactly, including any trailing =. Do not replace it with a product ID or construct it yourself. Keep the filter and sort settings consistent while continuing the same result sequence.
Page size and processing limits
The 250-product page limit does not override query-cost limits. Reduce the page size or requested data when needed. Ordinary pagination also has a 25,000-object limit; for larger exports, consider bulk query operations or appropriately filtered queries.
Check the response body
HTTP 200 alone does not prove a successful read. Inspect GraphQL errors and the returned data before collecting a page or advancing its cursor. Avoid appending the same page again when retrying a failed request.
Example: Retrieve Shopify Product Data with Postman
Our Test Store contains 17 products. We retrieved them in two requests, using first: 10 to demonstrate pagination. The first request returned 10 products; the second returned the remaining 7. A single request could also retrieve all 17.
The reusable template above passes inputs through variables. Our recorded requests put those values directly in the query string.
Request 1: Retrieve the first page
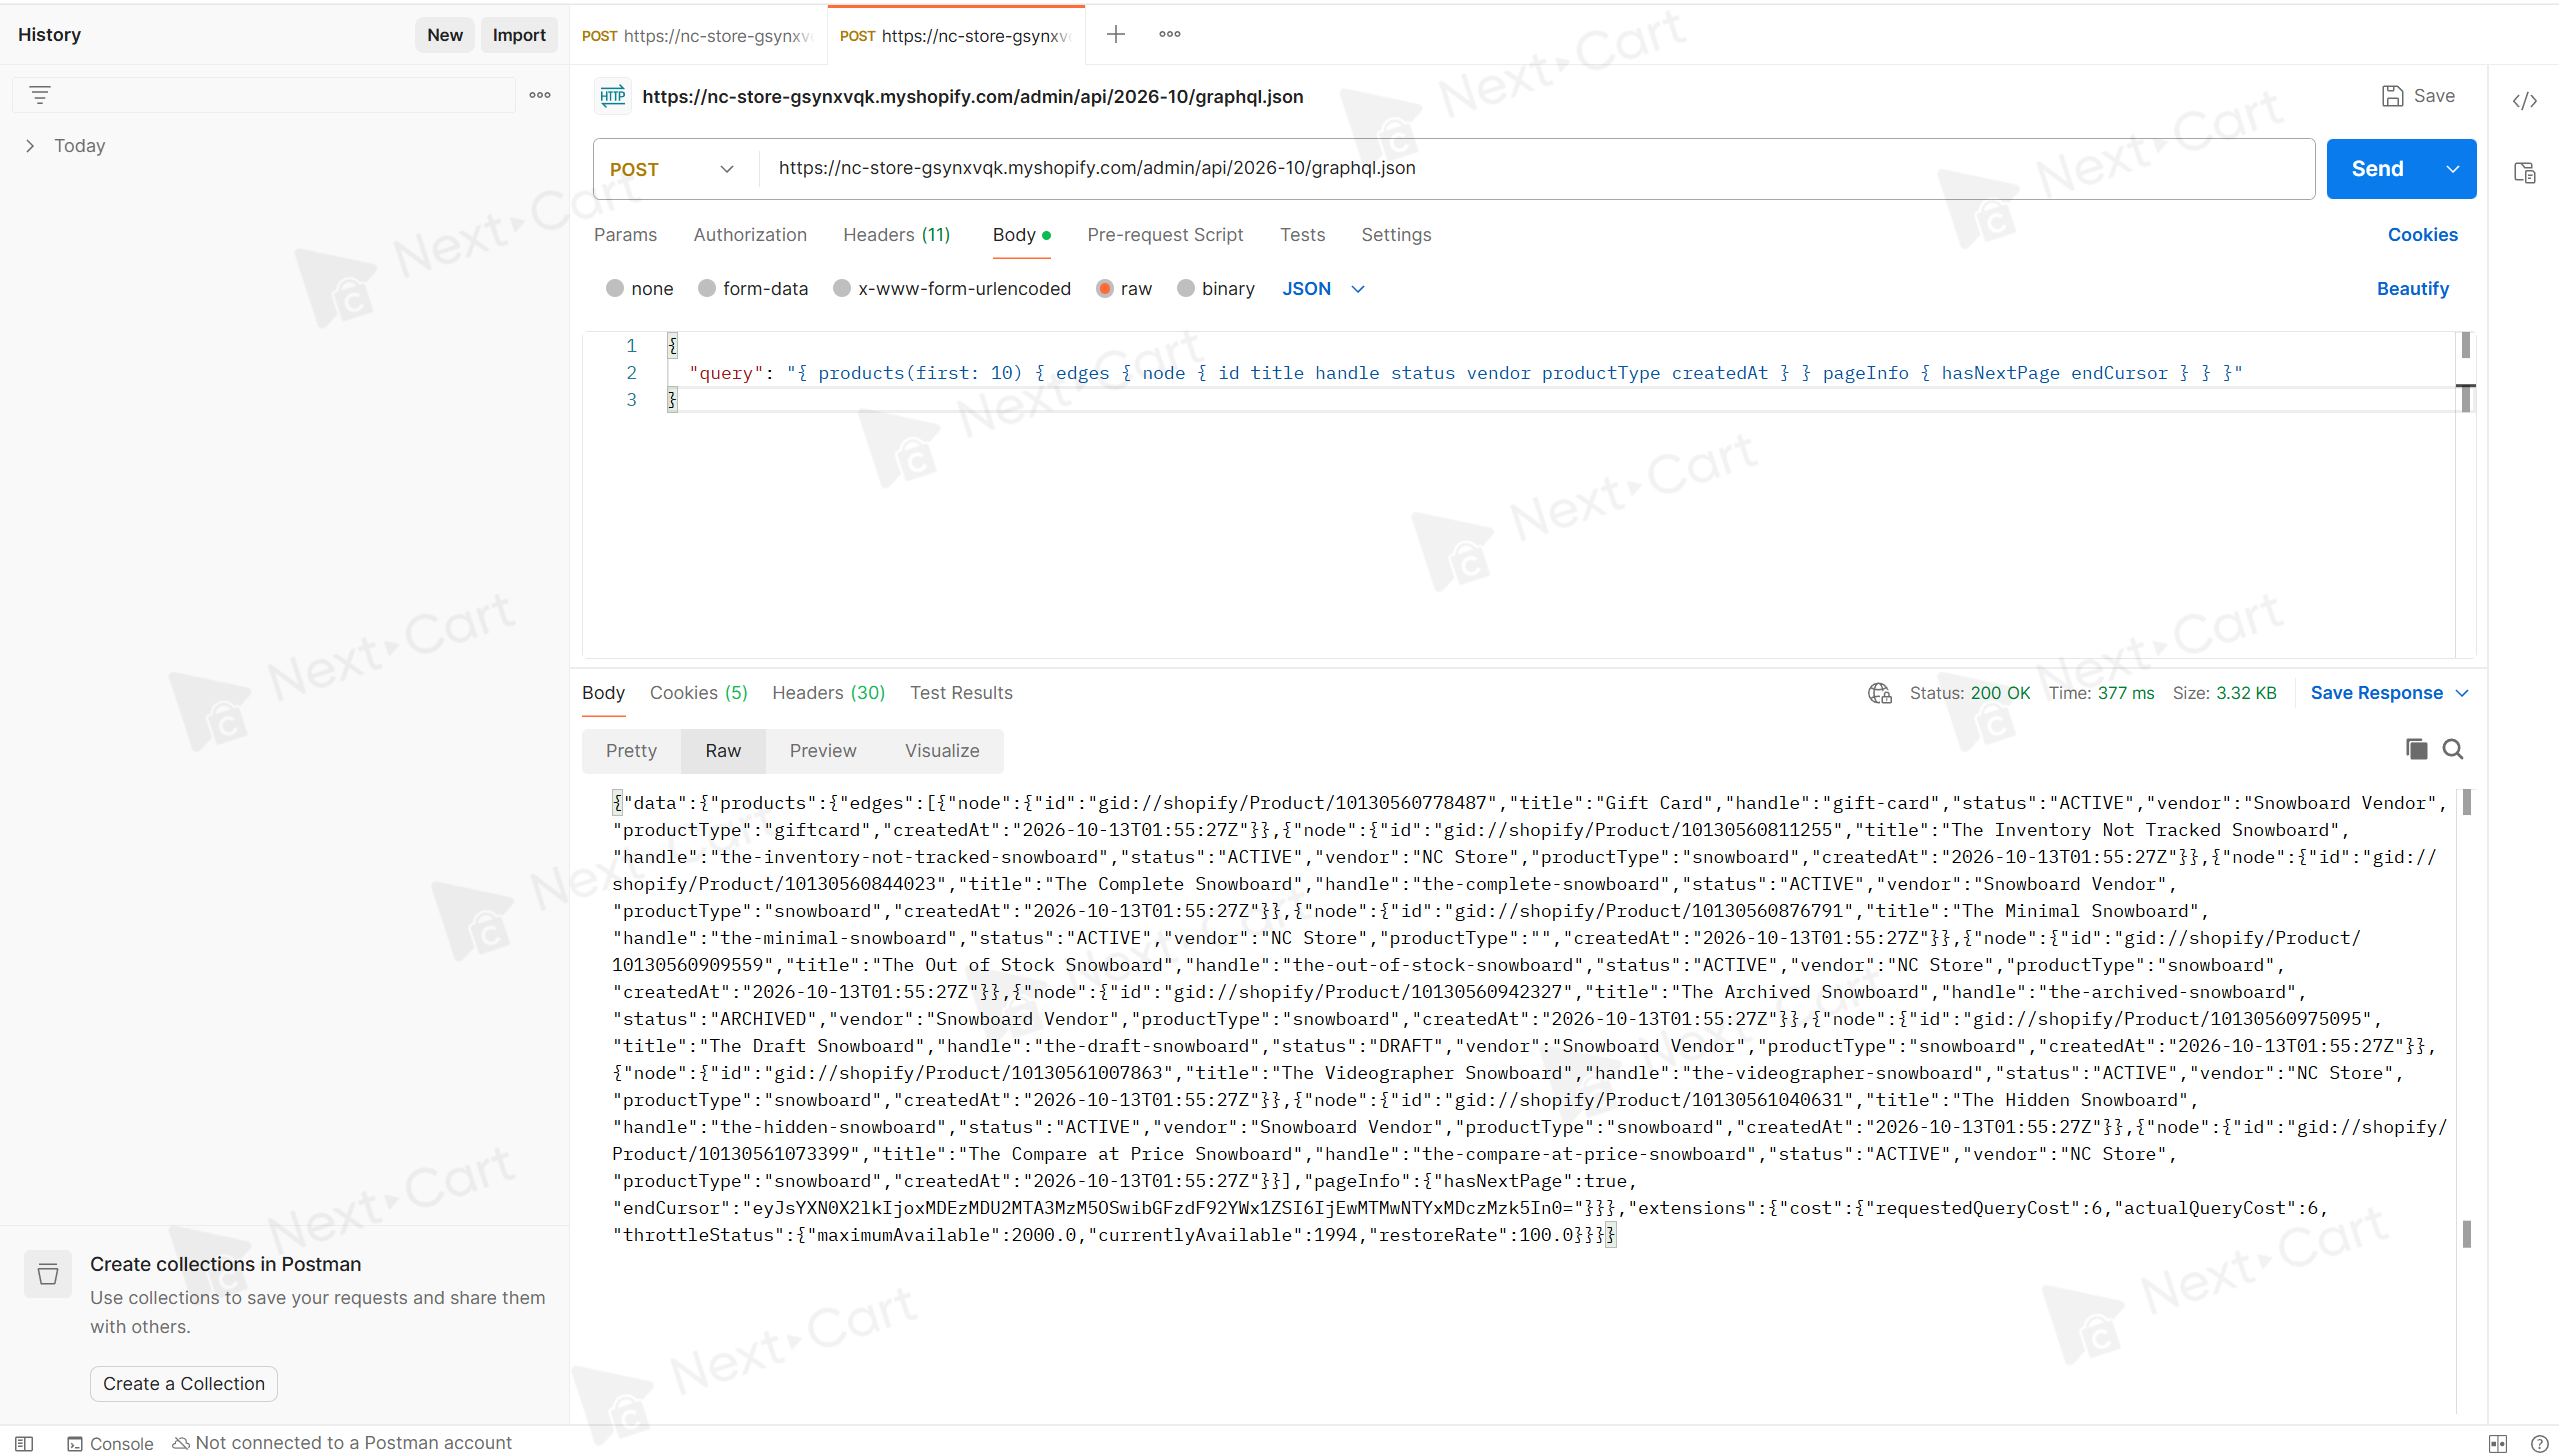
We sent a POST request from Postman to our Test Store’s 2026-10 GraphQL Admin API endpoint, using the access token obtained during setup. The JSON body contained the following query:
{
  "query": "{ products(first: 10) { edges { node { id title handle status vendor productType createdAt } } pageInfo { hasNextPage endCursor } } }"
}
products(first: 10) requested up to 10 products. Each edges entry wrapped a node containing the seven selected fields. We omitted after for the first page. The response contained 10 product records and this pageInfo excerpt:
{
  "hasNextPage": true,
  "endCursor": "eyJsYXN0X2lkIjoxMDEzMDU2MTA3MzM5OSwibGFzdF92YWx1ZSI6IjEwMTMwNTYxMDczMzk5In0="
}
hasNextPage: true indicated that more products remained. We used the returned endCursor as after in our second request.
Request 2: Retrieve the remaining products
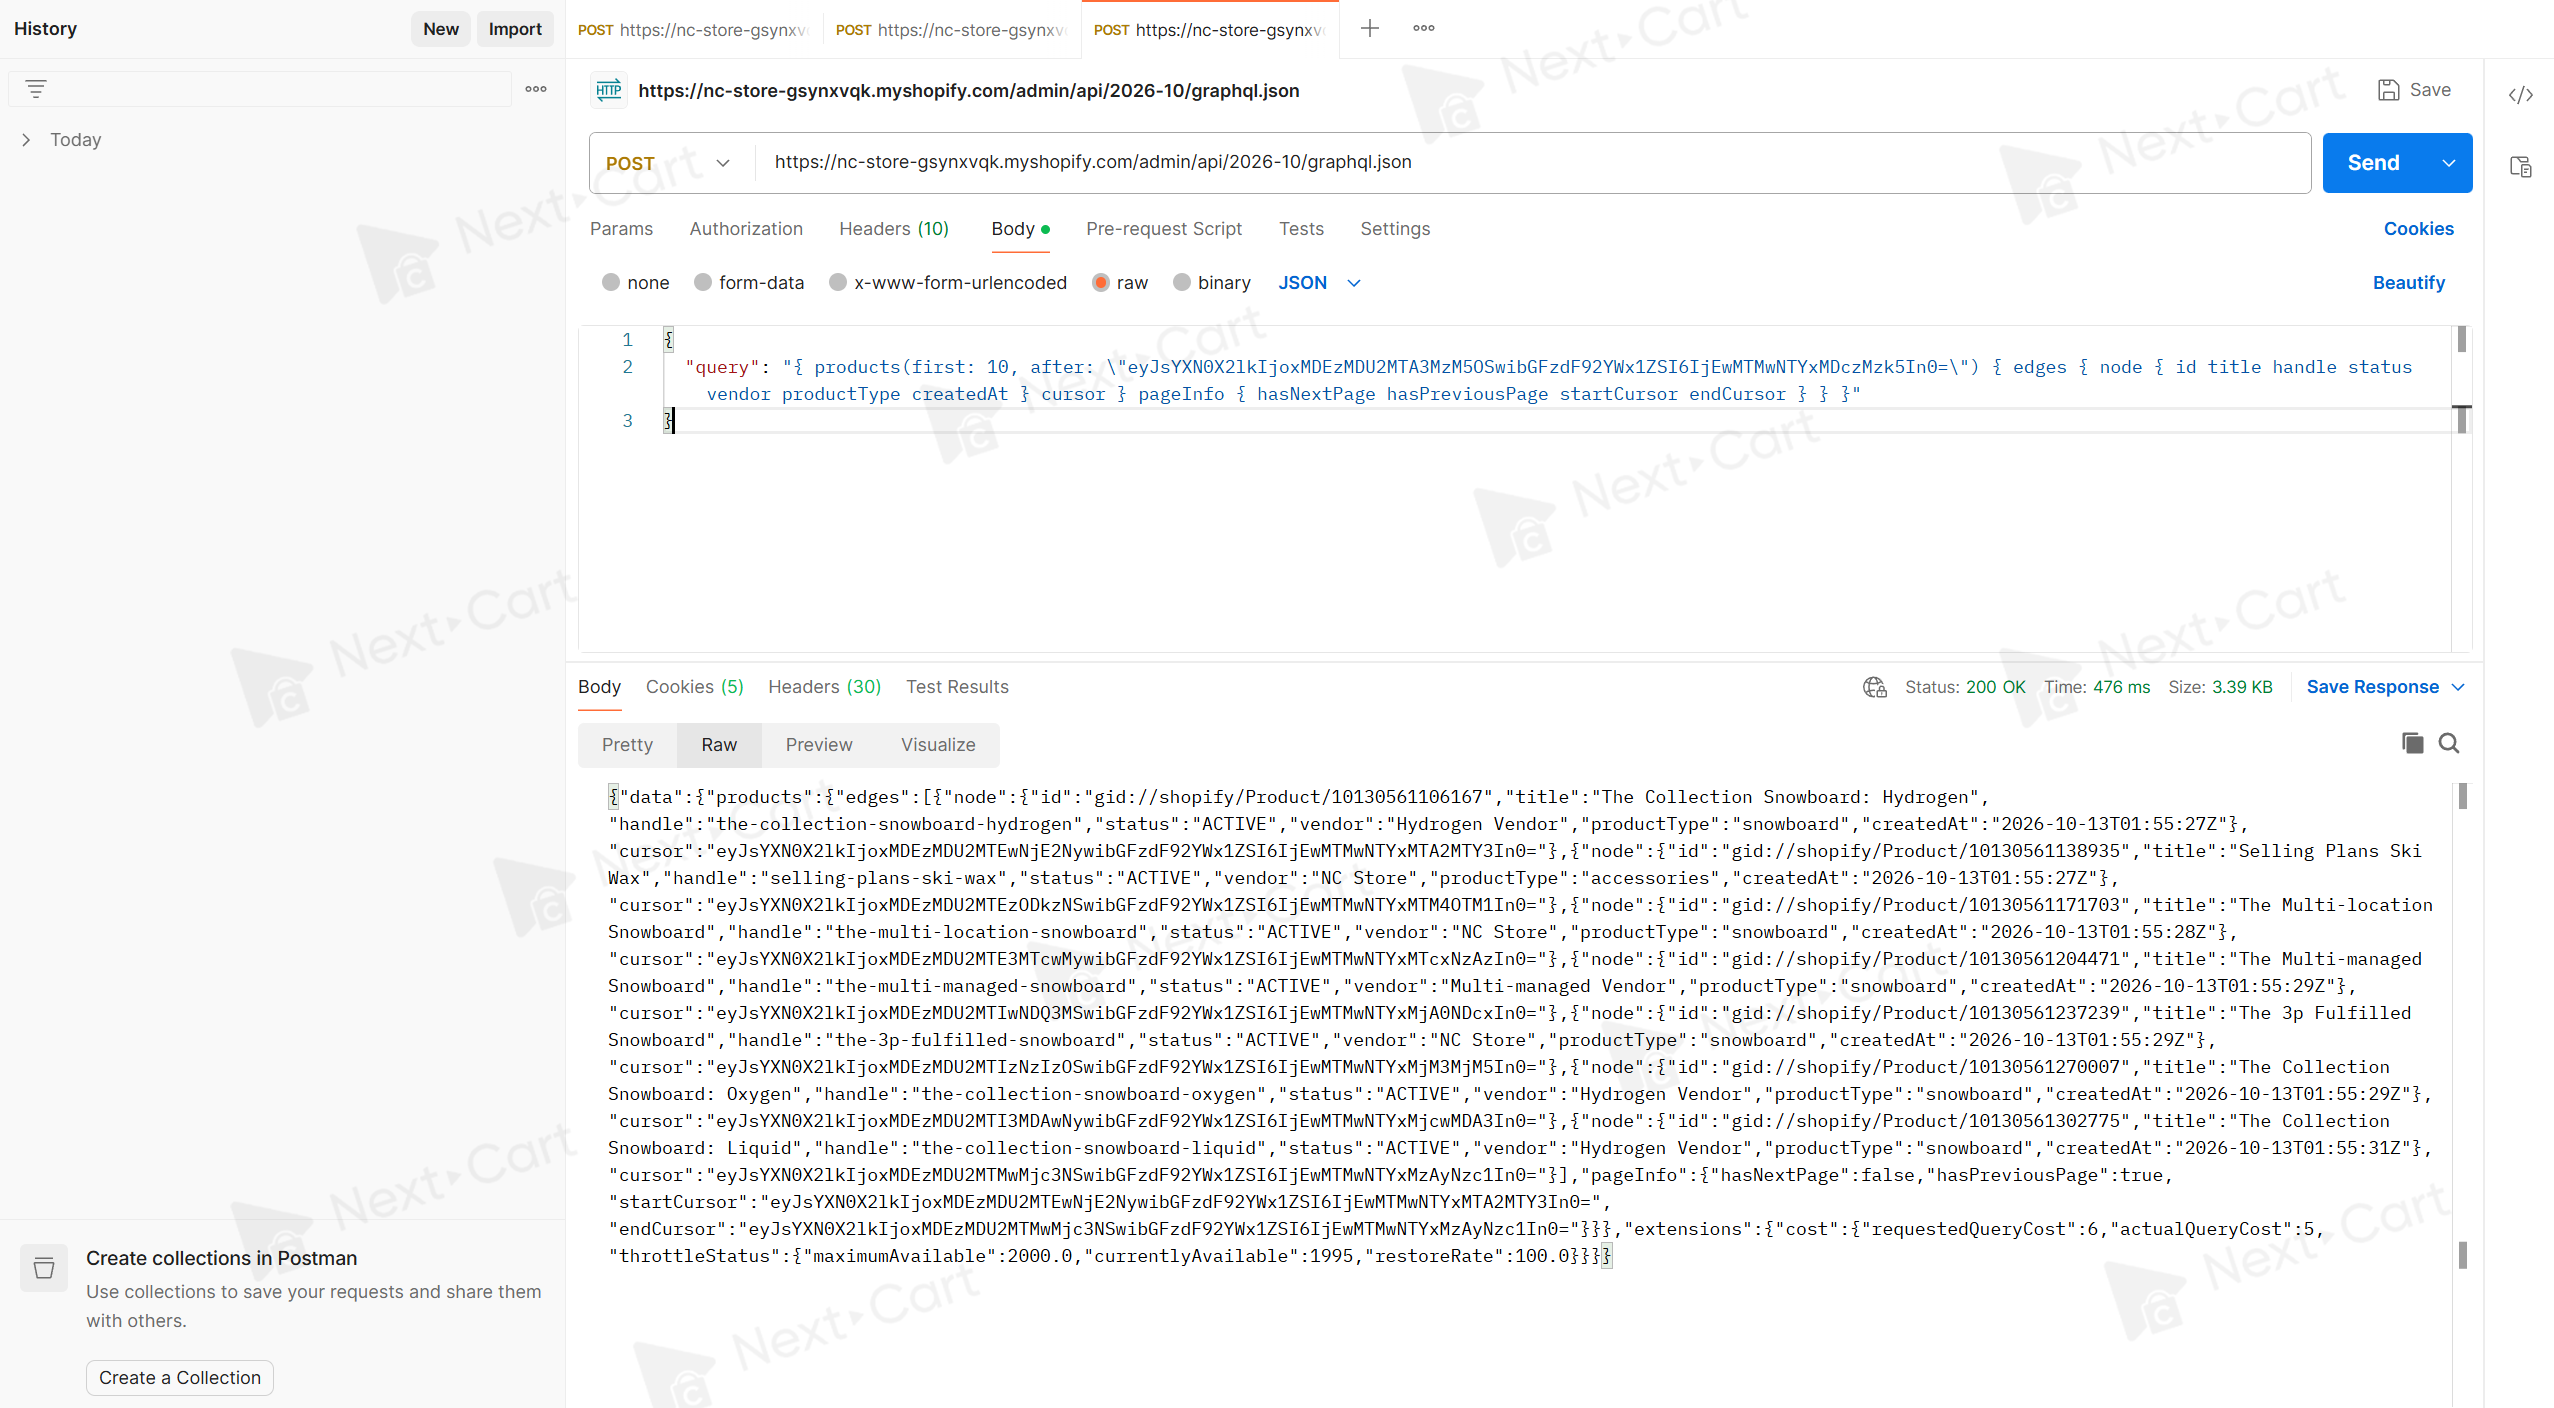
For the second request, we kept first: 10 and the same seven product fields, then added after using the exact endCursor returned by Request 1:
{
  "query": "{ products(first: 10, after: \"eyJsYXN0X2lkIjoxMDEzMDU2MTA3MzM5OSwibGFzdF92YWx1ZSI6IjEwMTMwNTYxMDczMzk5In0=\") { edges { node { id title handle status vendor productType createdAt } cursor } pageInfo { hasNextPage hasPreviousPage startCursor endCursor } } }"
}
The \" sequences escape quotation marks around the cursor inside the JSON string. We also requested edges.cursor, hasPreviousPage, and startCursor; these are optional for forward pagination.
The second response contained the remaining 7 products, with this pagination metadata:
{
  "hasNextPage": false,
  "hasPreviousPage": true,
  "startCursor": "eyJsYXN0X2lkIjoxMDEzMDU2MTEwNjE2NywibGFzdF92YWx1ZSI6IjEwMTMwNTYxMTA2MTY3In0=",
  "endCursor": "eyJsYXN0X2lkIjoxMDEzMDU2MTMwMjc3NSwibGFzdF92YWx1ZSI6IjEwMTMwNTYxMzAyNzc1In0="
}
hasNextPage: false marked completion, while hasPreviousPage: true indicated preceding results. startCursor and endCursor marked this page’s first and last products; each edges.cursor marked an individual product’s position. These opaque cursor values are not product IDs.
| Request | Products returned | hasNextPage |
Observed continuation |
|---|---|---|---|
| 1 | 10 | true |
We used this page’s endCursor in Request 2. |
| 2 | 7 | false |
No further page followed. |
| Combined | 17 distinct product IDs | Not applicable | The two pages contained all 17 products, with no duplicate product IDs. |
Verify the returned product data
The first page included this node for The Complete Snowboard:
{
  "id": "gid://shopify/Product/10130560844023",
  "title": "The Complete Snowboard",
  "handle": "the-complete-snowboard",
  "status": "ACTIVE",
  "vendor": "Snowboard Vendor",
  "productType": "snowboard",
  "createdAt": "2026-10-13T01:55:27Z"
}
The record contains the same handle, status, vendor, and productType listed in the reference values above. Its fields represent:
| Field | Meaning |
|---|---|
id |
The product’s global Shopify identifier. |
title |
The product name. |
handle |
The product’s readable identifier. |
status |
The stored product status, such as ACTIVE, DRAFT, or ARCHIVED. |
vendor |
The supplier or brand value recorded on the product. |
productType |
The product type stored in Shopify. |
createdAt |
The product creation timestamp; the final Z denotes UTC. |
Our query did not include an ACTIVE filter, so the responses also included draft and archived products. Some records contained an empty productType string; that response value alone does not establish an API failure.
This operation retrieved the selected product-level fields for all 17 products in our Test Store. It did not retrieve variants, SKUs, media, or inventory; those remain separate extraction requirements in a Shopify migration.
Shopify API Troubleshooting: Common Errors and Solutions
Use the response message and the missing data to narrow the problem: access, request syntax, pagination, or query capacity. The table covers product retrieval in Postman, regardless of the catalog size.
| Symptom or error | What to check | Corrective action |
|---|---|---|
401 Unauthorized or rejected authentication |
Store domain, app installation, the token in X-Shopify-Access-Token, and token expiry. |
Send a valid access token for the installed app and selected store. For the client credentials grant, request a new token if it has expired. |
| Access denied for product data | The error message and the app’s granted scopes, including read_products for product reads. |
Update the app’s requested access and complete the applicable release and approval flow. Confirm that the token has the required granted access. |
HTTP 200 with errors or partial data |
Top-level errors[].message, errors[].extensions.code when present, and the affected data. |
Resolve the reported failure before treating the required data as complete. HTTP status alone does not establish a successful read. |
| Malformed JSON or GraphQL syntax error | The body mode, quotes, braces, cursor escaping, and GraphQL selection structure. | For a JSON request body, use Body → raw → JSON. Send the complete body with its query property; correct the reported syntax error. |
| Unknown field or argument | Field and argument spelling, nesting, and the schema for the API version in the endpoint. | Check the versioned products reference and correct the selection. Verify compatibility before changing API versions. |
| Only part of the product catalog is returned | first, pageInfo.hasNextPage, and any query filters. |
When hasNextPage is true, pass that page’s endCursor as after in the next request. Continue until false; check that filters match the intended scope. |
| Products repeat between retrieved pages | The outgoing after, filter and sort settings, and whether a retried page was collected twice. |
Use the preceding successful page’s endCursor unchanged and keep filter and sort settings consistent. Avoid appending the same page twice. |
| An expected product is absent | The selected store, query filters, and whether the relevant result pages have been retrieved. | Complete the intended retrieval and compare the expected product with Shopify admin. Absence from one page alone does not establish a failed connection. |
| Expected product fields, variants, or SKUs are missing | The selected fields and any errors affecting them. Check nested pagination for requested connections. | Add valid fields that the integration requires. Product-level fields alone do not include variant and SKU data; retrieve all required nested pages where applicable. |
THROTTLED |
The response’s extensions.cost and throttleStatus when available. |
Allow capacity to recover, then retry with backoff. Reduce request demand when necessary. |
MAX_COST_EXCEEDED |
The reported query cost, selected fields, and page size. | Reduce the page size or query complexity. Waiting alone does not bring an oversized query within the single-query limit. |
Keep a copy of the failing request and its response before making changes. Change one value at a time and resend the request so you can identify which adjustment resolved the problem.
Shopify’s query cost measures processing demand, not a fee for each request. See the status and error reference for response details.
What's Next: Building a Shopify API Integration
Once you can recognize a product in the response and verify its values, you have reached the goal of this first connection. You now know which store the app can access, where the token belongs, and how the query determines the data you receive.
For ongoing synchronization, developers still need to design how to retrieve all required data, detect changes, and handle failed requests. One successful demo query does not establish that a complete synchronization workflow is ready.
If your goal is Shopify migration to another platform, define the data scope and product mapping before you build the transfer.
Reading the source is the beginning: the data must arrive in the right place and be checked after the move.
Planning a migration and unsure which Shopify data you need to bring across? Explore Next-Cart's Shopify migration solution or talk to our team about your source platform, destination, and the information you need to retain so you can define the right approach.