Shopify comes packed with a wide range of features designed to support and optimize the operations of nearly any business model today. Some of its most powerful features include:
- Multiple sales channels: You can sell your products on your website, in physical retail stores, on social media platforms (TikTok, Facebook, Instagram, etc.), online marketplaces (eBay, Amazon, etc.), or even through customer chat channels.
- Multiple inventory locations: You can track inventory and sell products across different locations, including retail stores, warehouses, and pop-up shops.
- Multiple languages: You can display your products, collections, blogs, and web pages in various languages.
With these versatile features, Shopify caters to everyone from small businesses to large enterprises. But what about businesses that sell in multiple countries or companies with multiple brands?
- For businesses selling in multiple countries, they often want dedicated storefronts for each region – with separate languages, pricing (including currency), and localized content. However, they still want to share product and inventory data across markets while keeping customer and order management centralized.
- For companies with multiple brands, it’s only natural that they want separate storefronts for each brand, with different product lines targeting distinct customer segments. In this case, centralized management of products, customers, and orders may not be necessary, although some higher-level oversight might still be helpful.
So, can Shopify meet these more complex requirements? The answer is yes. To do that, you’ll need to set up a multistore architecture. On Shopify, there are two main ways to build a multistore, depending on your specific needs.
Multi-Country Setup: Sell Globally with Custom Markets
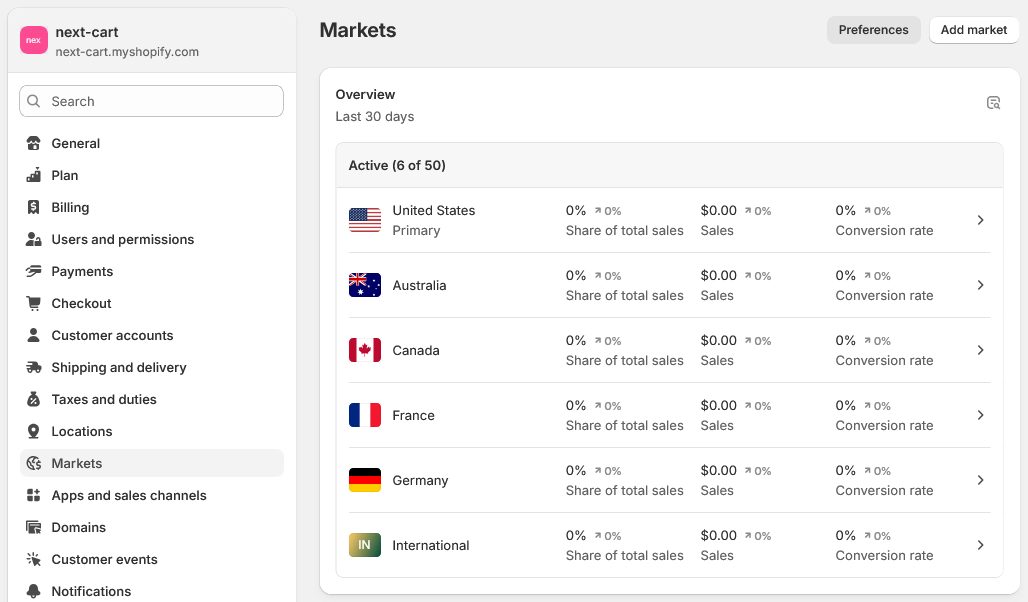
Shopify Multiple Markets
If you’re selling the same brand to customers in multiple countries, Shopify Markets is the ideal solution. Each market will appear for a specific country or region you choose. The steps to set up markets are quite straightforward:
A. Create Your Markets
- Log in to your Shopify admin and go to Settings > Markets.
- Create a market for each country or region you want to target (e.g., USA, Canada, Australia, Europe). Subfolders will automatically be added to your main domain for each market.
B. Add Domains, Languages, and Currencies
- Add languages under Settings > Languages. These will be used as the default language for each market.
- Add currencies using Shopify Payments. Note that Shopify Payments is only available in certain countries and regions, if your country isn’t supported, you’ll need a third-party app to handle automatic currency conversion on your storefront.
- Set up shipping rules for each market in Settings > Shipping and delivery.
- Once shipping is configured, you can set tax rules for each shipping zone under Settings > Taxes and duties.
- If you’d like to use separate domains or subdomains for each market, you can add them under Settings > Domains.
C. Configure Your Markets
- Once everything above is set up, return to Settings > Markets and assign the appropriate domain, language, currency, shipping settings, etc., to each market.
- To make sure visitors are directed to the right market, go to Settings > Markets > Preferences and enable the Country/region redirection option. You can also adjust other preferences as needed.
.
Now you’ve completed the basic setup for a Shopify multistore aimed at serving international customers. Keep in mind that on the Basic and Grow plans, your Shopify store can support up to 3 active markets. On the Advanced and Plus plans, there’s no limit to the number of markets, but starting from the 4th market, additional monthly fees will apply.
Multi-Brand Setup: Run Multiple Stores for Distinct Brands
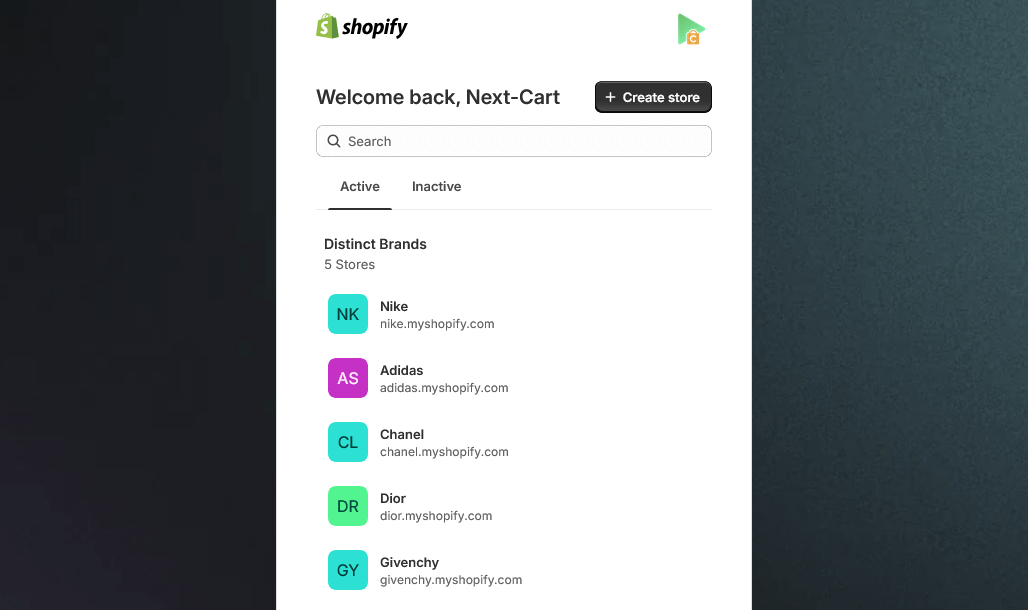
Shopify Multiple Stores
If you’re running more than one brand – each with its own identity, audience, and marketing strategy – then the best approach is to create separate Shopify stores for each brand. This setup will take more time than simply creating Shopify Markets.
A. Create the Stores
- Sign in or create a new account at shopify.com.
- In your Shopify admin dashboard, add a separate store for each brand.
B. Configure the Stores
- Add and customize themes and content for each store to match the unique identity of each brand.
- Add domains for each store. You can use different top-level domains like
brand-a.com,brand-b.com,brand-c.com, or use subdomains likebrand-a.yourcompany.com,brand-b.yourcompany.com,brand-c.yourcompany.com.
.
And that’s it – you’ve completed the basic setup to support a multi-brand business model. You could call this a “multistore architecture”, but in reality, it’s simply managing multiple Shopify stores under the same account.
Conclusion
Now you can feel confident that Shopify has the flexibility to meet even your most complex business needs. After setting up your multistore architecture, there’s still a lot to do before your storefronts are fully live. For example: adding products and content in the right languages for each store, building out collections and menus specific to each storefront, and so on.
If you’re currently running a multistore on a different ecommerce platform and want to move to Shopify without disrupting your existing structure, our Shopify migration service can help make the process as smooth as possible.
Thanks for taking the time to read this post. If you have any questions, don’t hesitate to reach out. We’re always here to help!