1. Set up Source Cart and Target Cart
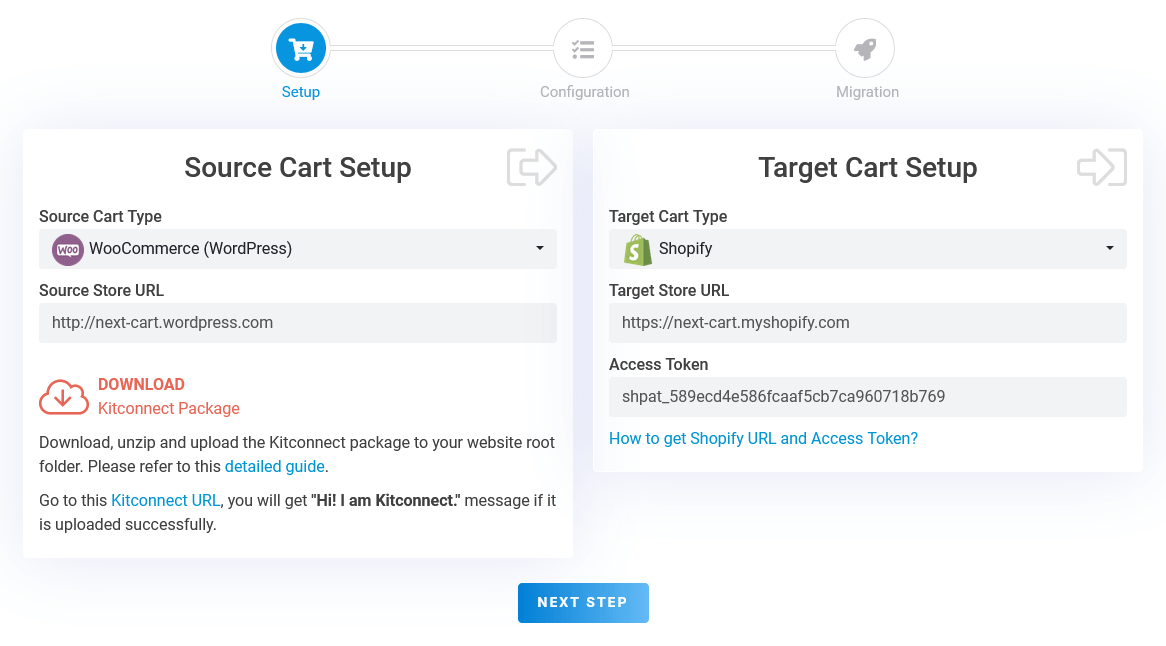
In the first step, you need to establish connections between the migration tool and your websites. Here, the Source Cart refers to the website you are migrating data from, and the Target Cart refers to the website you are migrating data to. There are three ways to set up the connections, and they apply similarly to both the Source Cart and Target Cart:
- For self-hosted websites (open-source shopping carts): Select the cart type of your website and paste its URL into the Store URL field. After that, download the Kitconnect package below the setup form, then unzip and upload it to your website root folder.
- For cloud-based websites (cloud shopping carts) that support API access: Select the cart type of your website and paste its URL into the Store URL field. After that, create and fill in the API information in the appropriate fields (You will find a link to the guide on how to retrieve API credentials below the setup form).
- For cloud-based websites (cloud shopping carts) that do not support API access: Select the cart type of your website and paste its URL into the Store URL field. After that, select and upload the data files needed for the migration (You will find a link to the guide on how to export the data files below the setup form).
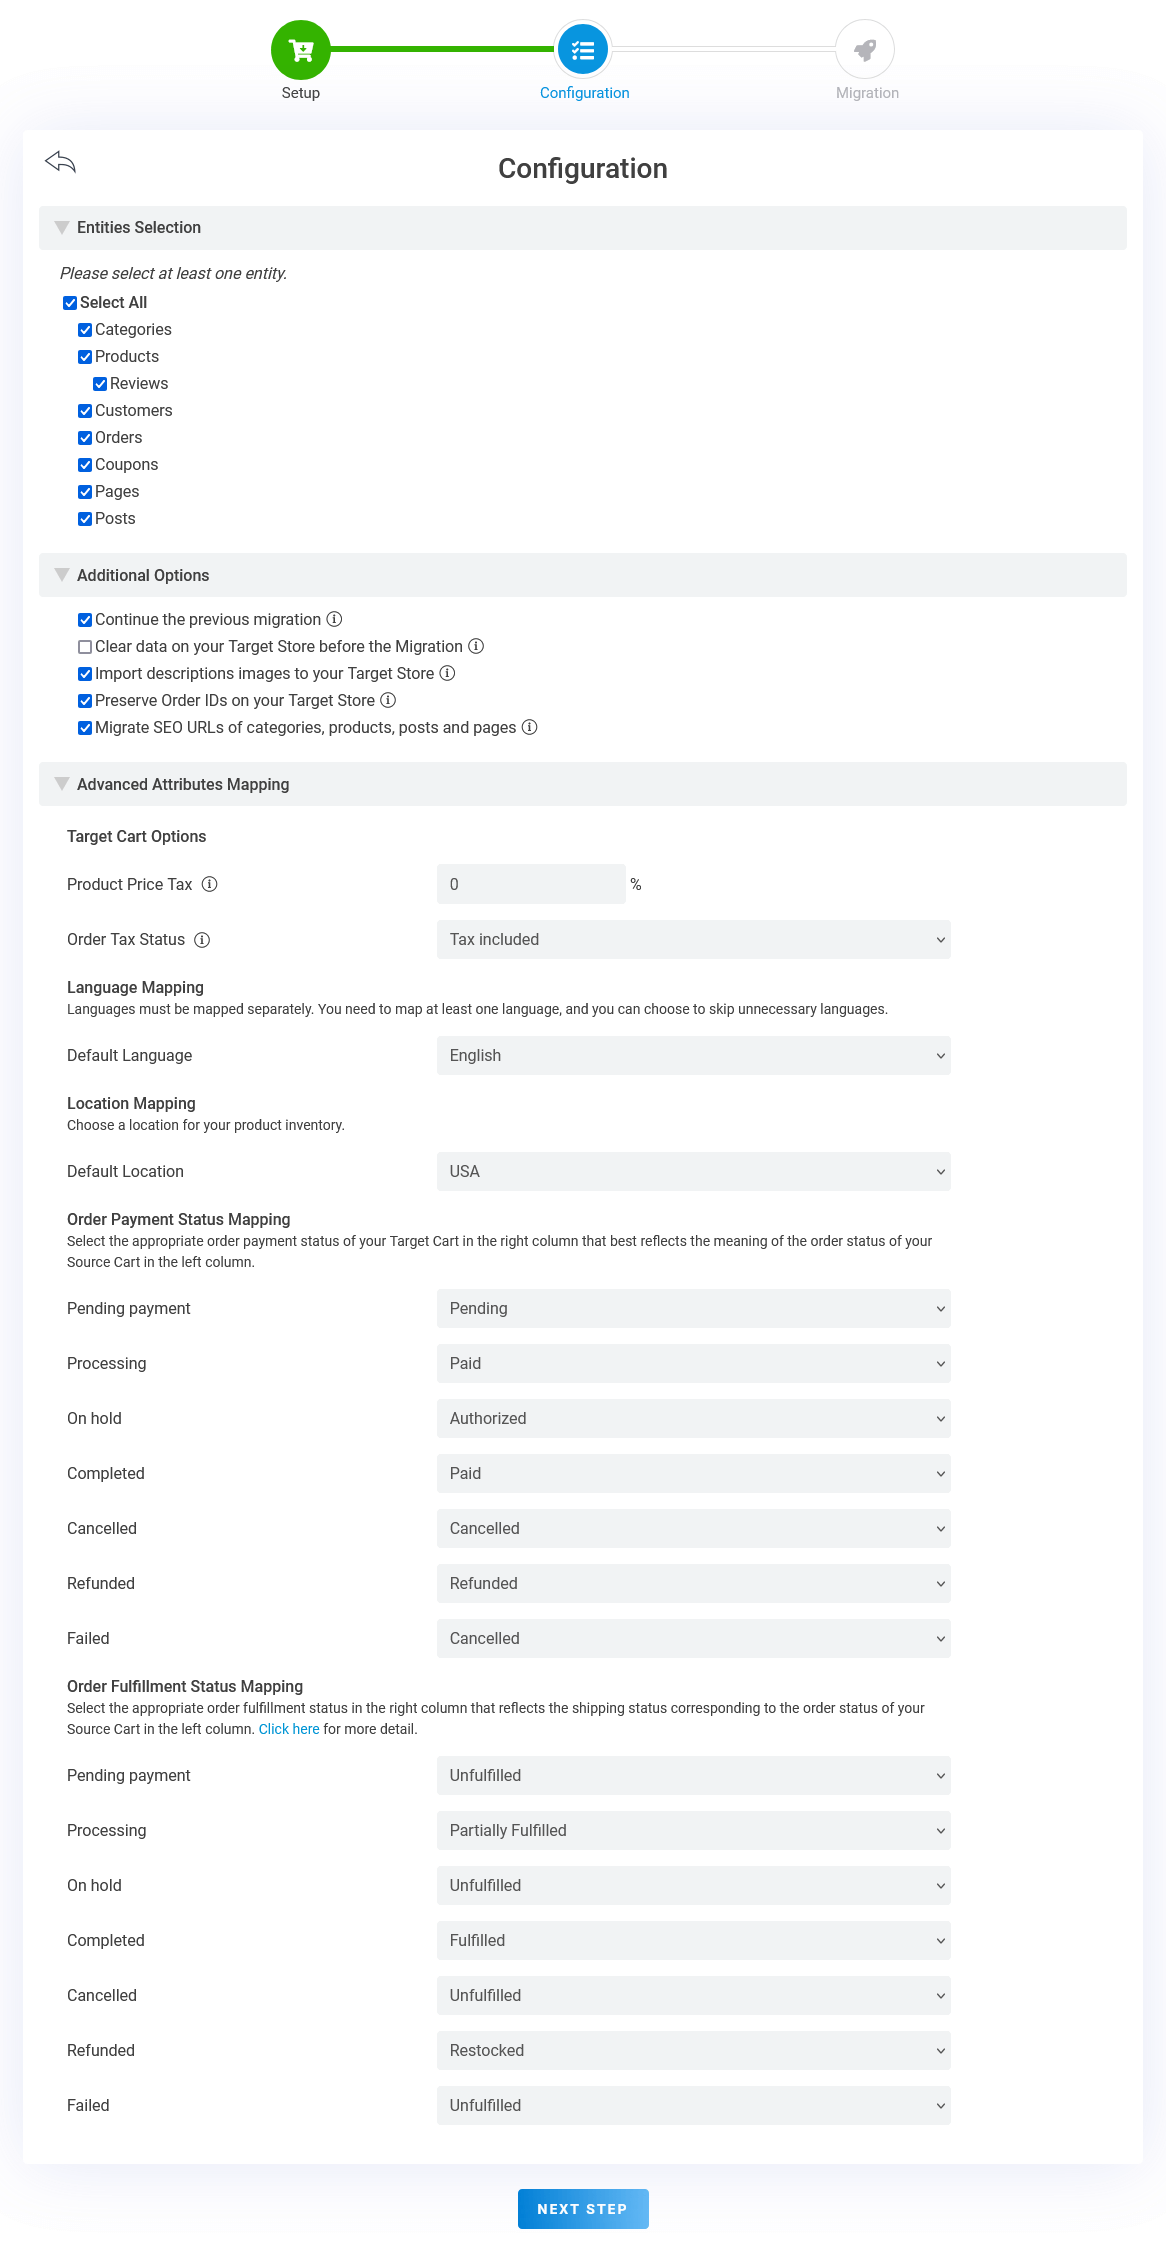
2. Configure the migration
In this step, you will see three sections containing settings for the migration process:
- Entities Selection: First, you need to choose the types of data you want to migrate. The data types can include Products, Categories, Customers, Orders, Blog Posts, Coupons, Reviews, etc.
- Additional Options: This section contains options that allow you to continue a previous migration, clear data on the new website, keep order numbers, or migrate URL redirects. These options are built into the migration tool and are completely free.
- Advanced Attributes Mapping: This section may contain specific options for the Source Cart and Target Cart. Additionally, you can map languages, customer groups, and order statuses.
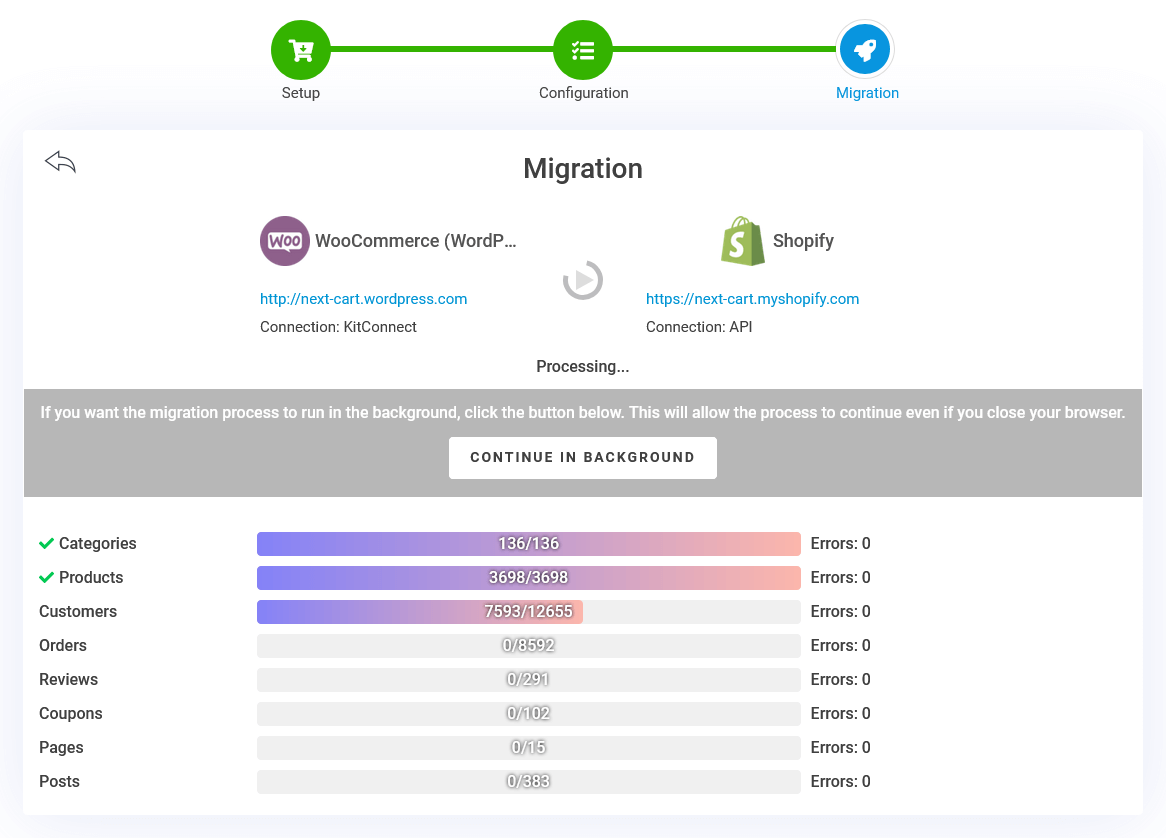
3. Start the migration
After completing the valid configuration in the second step, click the Next Step button to start the data migration process. At this point, you can move the migration to the background, allowing it to continue running even after you close your web browser.
The status of the migration will be continuously updated in real-time on the migration tool page until it is complete.