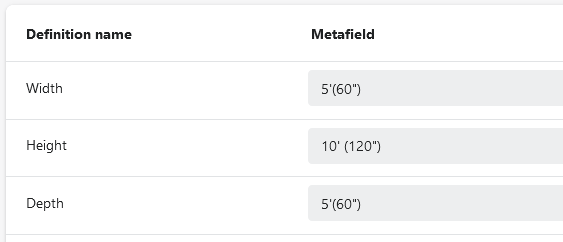
On Shopify, you can easily add metafields to products, variants and collections directly from Shopify admin. For example, you can add length, width, height to your product:

Shopify Metafields
But how to display the metafields on the storefront product page?
If you use a Shopify 2.0 theme, please follow the steps below to display the metafields (length, width, height) on your product page:
- From Shopify admin, go to Online Store > Themes.
- In the Current theme section, select Customize. You can also choose to customize other themes in your Theme library.
- In the top drop-down menu, select Products, then choose the template you use for your products.
- In the Product information tab, click Add block, then select Text.
- Now, you can add the metafields, one by one, to the new text block using the Connect dynamic source icon.
What if your current theme doesn’t support metafields or you want to change the way they display on your store. In that case, we have another simple solution: edit your theme code. It requires a bit technical knowledge but can be done within a few minutes:
- From Shopify admin, go to Online Store > Themes.
- In the Current theme section, select Actions (…) > Edit code.
- In the left sidebar, locate the
product.liquidfile. Its name might be slightly different depending on your theme, and it can be found inside the Templates, Sections or Snippets tabs. - Find the position you want to display the metafields, then insert the code below:
<div class="additional-attributes"> <table> <tbody> <tr><th>Height</th><td>{{ product.metafields.global.height }}</td></tr> <tr><th>Width</th><td>{{ product.metafields.global.width }}</td></tr> <tr><th>Depth</th><td>{{ product.metafields.global.depth }}</td></tr> </tbody> </table> </div> - Click Save. The metafields will now be displayed properly on your product page.
The metafields are supported by our Shopify migration tool by default. After the migration is complete, our technicians will help you edit the current theme to display the metafields according to your needs.